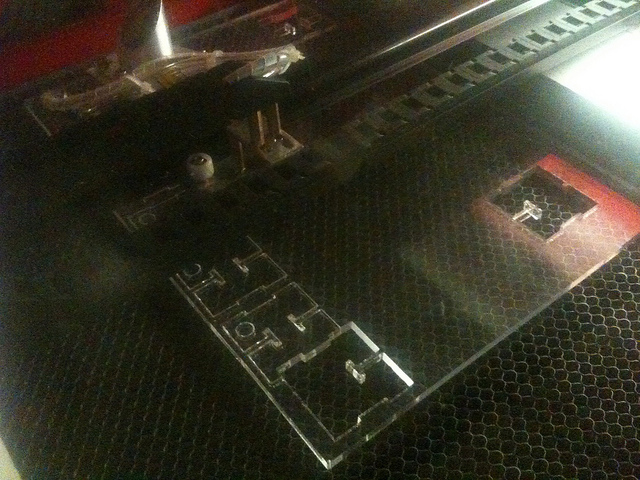
Equipment/HPC LS3060 Laser Cutter


Please don't touch or fiddle with the laser cutter unless you have been trained.
Please log your use to help with the up keep of the lasercutter.
This can be done easily at http://bit.ly/LaserLogbookForm and the records can be viewed at http://bit.ly/LaserLogbook
Training is given most Tuesdays at about 8pm, feel free to ask for help.
The laser cutter is unlikely to hurt you but you could easily hurt it without training.
Name
The computer is named after Kumar Patel.
See also: System naming
Status
Waiting for a replacement power supply (it has been despatched). Please do not use.
Remember to check the logbook
We're currently trying to reverse engineer the software.
Information about additional useful bits of software installed on the machine can be found on the software page.
Model
- HPC LS3060 "plus" laser engraver and cutter.
Specification
| Laser: | 40W - water cooled CO2 laser. |
| Working area: |
|
| Features: | Air-assist (removes debris from cutting region),
red-dot pointer (to show beam location) |
| Water cooling: | Simple tube cooling circuit connected with (9mm OD, 6mm ID) latex tube.
Uses supplied submersible pond pump (2.8m head, 2800L/H flow). |
Manuals
Safety information
- Please don't affect the cooling system without consultation - overheating or rapid cooling can damage the laser.
- Never leave the laser cutter unattended - Your material may ignite, and an unchecked fire in the laser cutter could be both dangerous and costly. We've also seen mirrors go out of alignment and cut into the cables.
- In case of fire - Use the CO2 extinguisher by the laser cutter first. Do not use the powder extinguisher unless you feel that you can't control the fire. Put it in the logbook: tiny flames while cutting are normal; anything more must be reported.
- Never cut PVC or chlorinated plastic - You should always know what material you are cutting, and chlorinated plastics should be avoided because they release chlorine gas when cut.
- Do not try to cut metal in the laser cutter - If you wish to mark the metal, please use "Thermark Laser Engraving Spray / Paste", or use anodised aluminium.
Instructions
These instructions are intended as a companion to laser cutter safety training - not a replacement.
Refresher instructions found at Equipment/LaserCutter/Refresher
Powering on
- Insert key and turn - the PC is turned on using the 'sleep' button on the keyboard.
- Always perform the following pre-checks:
- Check that there is a CO2 fire extinguisher immediately to hand.
- Check that the water pump is running
- Check that the extractor fan is on
- Caution: Be certain that the water coolant is at a suitable temperature.
- If you are unsure if the cutter has been used recently, or you have been using the cutter for an extended period of time (an hour or so) check the temperature of the water using the infra-red thermometer.
- If the water temperature is outside the acceptable operating range (22 ± 3 °C) then wait for the water to cool before using the cutter.
Preparing your design
- Produce your design. There are various options for doing this but QCad is a good low-cost choice.
- Start the 'LaserCut' application and load/import your design.
- TODO Different file types pros/cons
- DXF is nice because it maintains absolute dimensions.
- Sometimes it's useful scale your design. The Laser cutter application allows for this but it's rather quirky:
- From the Laser software menu select 'Tools/Size'
- Calculate and enter your new widths/heights in Google/calc etc.
- Rotating
- Go to 'Draw/rotal'
- Enter the number of degrees to rotate
- Uniting lines (making the path finding suck a little less)use this if you've used lines rather than polylines is qcad etc.
- Go to 'Tools/Unite lines'
- Use the defaults
- You should see fewer direction lines, the laser cutter should use a less insane route now.
- The work-area in the LaserCut software is not an absolute representation of the laser cutter bed. The origin must be set relative to your design.
- From the LaserCut application menu select 'Laser/Set laser origin'
- Move the 'target' cursor and click on the location on your design where you wish to position the origin (this is usually at the top right of the design)
- You may also manually enter the position - the top corner of bed is located at (299, 559)
- Layers can be used in your design to provide combinations of different cut types and engrave options on a single piece. For example you may wish to cut out a key-ring and then engrave a name on it.
- Each layer can be assigned different action, speed and power settings - consult the manual or the wiki for appropriate settings.
- Finer control of layer power and speed settings is available by clicking on the layer
- Engraving:
- Try to align the bulk of the engraving with the short axis (y), the laser cutter seems to do passes in this direction only so if you have it aligned to the long (x) axis it will do many short passes rather than fewer longer ones, this can massively increase engraving time (minutes -> hours)
- Rather than slow down/increase power there is a setting to repeat a layer multiple times, this is very useful if using the engrave option to reach a certain depth.
- For fast prototypes the engraving step size can be changed (default is 0.1mm) a setting of 0.2 is good for depth engraving, again this can speed up the process a lot.
- Note if something hasn't cut/engraved to the complete depth (or you just want to run it again) it is possible to select which layers are 'output' by scrolling to the right in the layers box, this is very useful for an extra layer of engraving or to confirm a full cut. DON'T move the sheet before doing this.
Uploading your data file
- Upload the file to the design and settings to the laser cutter hardware as follows:
- Select the 'Download' button
- Remove any existing files by selecting them and clicking 'Del all'
- Download (upload) your file by clicking 'Download current'
- You should hear the laser cutter machine beep.
Positioning your material
- Caution: Know your material - be absolutely certain that your material is safe to use in the laser cutter. If in doubt - ask. For unidentified plastics try this test method.
- Caution: There are a number of electrically live areas inside the cabinet towards the back. Be very careful when reaching around at the back as you may get a shock.
- Place the material on the cutter bed.
- The bed height must be adjusted to the thickness of your material. Different materials should have the beam focussed in different places. Thicker materials should have the beam focussed in the middle of the material. You can adjust where the beam focuses by adjusting the bed height:
- Press the 'Z' button on the control panel.
- The display will show 'Z-Axis operate'
- Then press the 'Datum' button
- The display should now show 'Z-Axis datum' and the bed will move to the 0 point. Now you use the up and down buttons to move the bed.
- To make sure that your design will be cut within the boundary of your material you can have the cutter mark out the bounding box with the red-dot pointer. Note that you must upload your design to the cutter before doing this.
- Click the 'Run box' button in the laser cutter application
- Observe the path of the red-dot pointer
Cutting
- Caution: Never leave the machine unattended. The laser cuts and engraves by burning the material so you must be present to deal with any fires should this process undesirably escalate.
- Know where the CO2 extinguisher is and that you can easily get to it without having to come nearer to the cutter.
- Turn on the air pump on the main control panel
- To begin cutting press the 'Start' button in the laser cutter application.
- Monitoring progress
- TODO What to watch out for
- TODO What to do in case of problems
- Note: There are at least 3 different ways of stopping the cutter mid-process. There is the emergency stop button on the cutter, there is the stop button in the software (not recommended), and there is a sensor that detects if the lid is opened. There is also a pause/resume button on the cutter.
- Please be aware that the software stop button has on at least two occasions had the unfortunate effect of moving the laser back to the start position while it was still on, leaving unwanted lines cut into the material.
- TODO What to try if the result is not what you expect
- Log your Laser Cutter use in the logbook
When cutting flammable materials (or non-flammable materials which happen to emit gases which are flammable when cut) or materials with a thin oil/wax film - be prepared for fires or small flames. While not common - it does happen occasionally and should not be cause for panic. When it happens - press the stop button and use a small gentle blast of CO2 fire extinguisher to douse it. There is no need to get very close to the fire - generally the box 'fills' up with the CO2 gas which is heavier than air - esp. when things are not yet hot. Note this in the logbook (both so we can replace the CO2 and because of sooth on the lens). Don't forget to report any fire in the logbook.
In the unlikely event that you cannot contain the fire with CO2 - switch to the powder extinguisher. Do not use water (risk of electrical shock). If you use the real (sealed) extinguisher - post an incident follow the accident/reporting protocol - to comply with fire, health and safety regulation.
If you are unfamiliar with fire extinguishers - and why there are many type - then read the instructions on both the CO2 and the ABC extinguisher (http://en.wikipedia.org/wiki/Fire_extinguisher) as to understand the difference.
What to do with Scraps
You can either make some LaserCut Mechano with the scrap (files here: C:\Documents and Settings\Hackspace\My Documents\LaserCutMechano), put the scrap into the container on the right hand side of the lasercutter or, if the piece is too small to be useful, the 'landfill' bin in the workshop.
Chlorine Testing
Chlorine is a very dangerous gas used in the creation of many plastics (e.g. PVC) these are safe until heated; when they release the chlorine gas. The laser cutter will easily heat plastics enough to release chlorine.
To test an unknown plastic for chlorine content try the following:
1. Heat some copper (wire's easiest) until red hot (do this for a while to remove any PVC that may be stuck to the wire from the coating).
2. Apply red hot copper to plastic so that it melts a little onto it.
3. Heat copper wire until red hot again.
4. A green flame means that the plastic contains chlorine so do not use it.
Parameters for different materials
If you found some sweet settings please share them here.
Tried but DIY parameters
- Laser rubber has been used (mainly for stamps) it works well but you'll need to experiment for engraving/cutting
Cutting
| Material | Thickness (mm) | Speed (mm/sec) | Power (%) | Corner power (%) | Examples / Notes |
|---|---|---|---|---|---|
| Ply wood | 3 | ? | ? | ? | |
| MDF | 3 | 4 | 100 | 20 | |
| Acrylic - Perspex | 4 | 3.5 | 100 | 21 | |
| Acrylic - Palglas | 3 | 6 | 100 | 21 | Cubauble |
| Suede | 1 | 25 | 100 | 25 | |
| Unknown clear thermoplastic | 4 | 10 | 10 - 15 | 10 | These box lids melt easily but can be cut with multiple passes at low power. |
Engraving
| Material | Speed (mm/sec) | Power (%) | Corner power (%) | Examples |
|---|---|---|---|---|
| Anodized aluminium (dyed black) | 450 | 90 | ? | LHS logo on black phone |
| Anodized aluminium (Macbook Pro) (Vector - in "cut" mode) | 100 | 100 | 80 | Russ's Macbook Pro |
| Suede | 250 | 15 | 80 |
Consumables
- Plastic Online
- HPC sheet products - Laser ply, perspex, engraving laminate - where we purchased the cutter.
- The Plastics Shop - mattp purchased the plastic for the first batch of Hackspace key rings from here.
- Hamar Acrylic Cuts to size, and is ~10mins walk from the space. Order by phone and it should be cut and ready to collect on arrival.
- Price guide 320x600x4mm (laser bed size) clear acrylic = £8.
- Acrylic-Online - Elliot has bought some Palglas from here. They cut to size - delivery £8.00. Price guide (incl. VAT):
- 320x600x4mm (laser bed size) clear acrylic (Palglas) = £5.12
- Hobart Laserables - wide range of materials: MDF, Birch, Acrylic (clear and coloured), Rubber, Laminates, Anodised metal. Prices seem competitive. Nigle has ordered from here. Prices don't include VAT. Shipping is £12.
- Fred Aldous – online craft supplies, free delivery on orders > £30. Polypropylene sheets amongst other things. Alex P has ordered from here.
Running cost
- The tube is £250 for 1000 hours
- The lens+mirrors are £150 for 250 hours
- The power is (say) 1.2kW at £.2/kWh.
- So 250/1000 + 150/250 + 1.2*.2 = £1.09/hour
- The space also used a large chunk of funds to get the cutter, this needs to be recouped.
Therefore a recommended donation of £5 for each hour of use would be greatly appreciated.
Laser cutter money held in the the foundation bank account:
| Date | Amount |
|---|---|
| 2011-04-02 Usage Fees | + £210 |
| 2011-05-28 Usage Fees | + £248.44 |
| 2011-06-08 Optics set | - £188.25 |
| 2011-06-20 Cash from tin | + £30.00 |
| 2011-06-20 Water + tubing change | - £30.00 |
| 2011-06-28 Usage Fees | + £25.04 |
| 2011-07-12 Usage Fees | + £88.46 |
| 2011-07-27 Usage Fees | + £70.58 |
| 2011-12-17 Usage Fees | + £135.66 |
| 2012-01-21 Usage Fees | + £48.72 |
| Running total | £638.65 |
Cleaning Schedule
- Optics cleaning every 25 hours (or as required)
- Extraction fan cleaning every 25 hours
- Electronics section dust removal every 25 hours
- Laserbed cleaning every 50 hours (soaked in a peroxide based cleaning solution)
Changing machine options
If you change ANY settings you MUST log them on the wiki lasercutter logbook
advanced use only! Please make sure current settings are backed up first (sorry I don't know how to do this).
Click File->Machine Options. This will show you a dialog like this:

Make your changes.
Useful that I've found is the Machine options -> worktable page. This allows adjustment of scaling for x and y axis. Decrease the numbers to increase the distance moved. I got good scaling with 0.00635 for both.
Then click 'save' and OK the password dialog. The settings won't become live until you download them to the cutter.
Click 'download' as if you were putting a new design on the cutter, but then click 'download cfg'. The machine should beep. I had problems with this and then cutting a pattern, the machine always told me 'soft stop'. I 'fixed' it by powering off the machine before downloading the new settings.
More information
- How the cooling system works
- Some useful laser info from Adafruit - the settings section in particular gave a good idea of what we can expect.
- More information about the controller card used by the cutter
- http://www.leetro.com/english/sale/20.html
- http://www.leetro.com/english/sale/23.html
- Latest version of the software
- Firmware for MPC6515 controller and software (hit the download page for latest version)
- For making boxes, you can use this script - recommended settings of "--bolt_length 13 --nut_multiplier 1.8" YMMV
- http://rahulbotics.com/personal-projects/boxmaker/?boxmaker/ is also _very_ good for making boxes.
- QCAD - open source .dxf exporting 2D CAD program
- Using Google SketchUp for Laser Cutter designs.