Equipment/Makerbot Cupcake
Jump to navigation
Jump to search
The printable version is no longer supported and may have rendering errors. Please update your browser bookmarks and please use the default browser print function instead.
We have a Makerbot Cupcake (batch 9, #402)! It's cool.
If you haven't used it before, please contact Russ and get him to show you how it works.
If you're using the Makerbot and have issues with it, or have to do maintenance/modifications to it, please note them in the logbook below. This lets other users know what the state of the machine is.
Drivers for USB-serial cable: [1]
Logbook
03/05/2010 Operator: Jasper
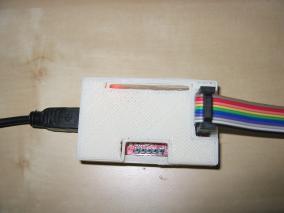
- printed the bus pirate box for real this time (after a bit more trial and error)
- the X axis stepper motor was backwards so swapped the connector around, now things won't be mirrored.

27/04/2010 Operator: Russ (write up by jasper)
- JasperWallace printed a box for a BusPirate, discovering that printed things shrink by 0.5% to 0.75%
19/04/2010 Operator: Russ
- Motherboard + Extruder firmware to v2.0 release 1. HBP now internally powered.
18/04/2010 Operator: Nandish
- was unable to find SDCard reader - printed via USB
- multiple failed prints at raft lay down
- unconnected HBP cables lifted plate while it moved warping the raft
- abs not adhering to HBP - maybe extrusion temp
- extruder ploughing up cleanly laid down raft in one corner and printing in mid-air at other
- resolved raft issues with calibration
- partially successful print aborted after abs feed caught on speakers
- several layers missed, extrusion resumed in mid-air, print aborted
13/04/2010 Operator: Russ
- Installed heated build platform v2, externally powered.
29/03/2010 Operator: Solexious
- First attempt, extruder was to close to the platform resulting in the abs being 'threaded'. After heating the extruder and manually feeding the abs the makerbot was back in working order.
- The makerbot successfully printed a single, and a 2X2 grid of Hackspace Coins http://www.thingiverse.com/thing:2113
29/03/2010 Operator: Russ
- After a couple more crashes, downgraded extruder to 1.5.
16/03/2010 Operator: Russ
- Ambient temperature is quite a bit warmer now, which probably helps.
- Successfully printed a whistle! (the overhang on the top means it's not terribly functional but it finished)
- Across about 70mins of print time I had two crashes :/
11/03/2010 Operator: Russ
- Received and fitted new insulator/barrel/nozzle/nichrome. Extruder is working much better now.
- Also received 5lbs of PLA. I don't want to use it until we've done the M8 nut mod to the extruder, and we've got a spare insulator retainer. So we're still on ABS.
- Upgraded motherboard to 1.5, extruder to 1.8 with heated build surface. My ReplicatorG is now 0013.
- Managed to successfully print an insulator retainer! It's a bit stringy but it's a start.
- I'm wondering if the thermistor is a way off. Fiddling with the thermistor calibration didn't get very far.
- I honestly think we're nearly there ;)
02/03/2010 Operator: Russ
- Filament drive pulley replaced. We now have 4 spares.
- Still hitting problems where the filament drive stopped and gouged a hole in the pulley, which seems to indicate barrel undertemperature or blockage.
- Tried increasing temperature. Increasing extruder temperature above 255 appears to cause the heater to run away. I melted the insulator. Silly me.
- Ordered new insulator+barrel+nozzle+nichrome.
11/02/2010 operator; Glen
- To print warp free large objects heat the perspex plastic bed to 100'C with the hot air blower then make sure the first two base layers are stuck to the bed by adjusting the Z-axis height. Don't use the electric fan heater as this increases cooling of the plastic. I used the hot air de-soldering blower at 100'C to keep the plastic warm while printing, though I didn't try printing without this.
- The extruder gear wheel has a part missing from it that limits where the plastic feed can rest against the gear teeth. Until the drive gear is replaced the plastic feed can work it's way next to the idler wheel where it will no longer be driven. I tried putting two idler wheels in to stop the feed from having any space to get away from the drive gear, but this didn't work so I went home.
- Consider selling the printer to some poor fool on eBay, as far as I know it's printed no large objects despite receiving dozens of hours of maintenance and is clearly possessed by angry spirits.
09/02/2010 Operator: Russ
- Extruder with 2 idler wheels doesn't appear to work at all.
- Reassembled the extruder with one idler wheel, moving the drive wheel up the shaft a little.
- This works, but the extruder stalls after a random amount of time! WTF. We need a new drive wheel.
08/02/2010 Operator: Glen
- Can printed half a large object with no warping by melting the raft to the print surface.
- Print-head failed push plastic feed into nozzle
- Dismantled the print-head and found the gear that drives the plastic feed stock had broken in two and the two parts had ground against each other to produce many tiny metal shards.
- After cleaning the print-head the plastic would not come through unless pushed by hand.
06/02/2010 Operator: Russ
- Downgraded both motherboard and extruder to 1.5 firmware.
- Printing off SD card, no crashes observed.
- Managed to get about 80% of a shot glass printed. Glitches caused by contraction were an issue, and eventually it got knocked off by the print head.
- I'm fairly sure the hardware is working fine. Problems I'm now seeing are caused by either ambient temperature/airflow or skeinforge settings.
04/02/2010 Operator: Russ
- Walked in, started it up, extruder works fine.
- Extruder idler pulley needed re-adjusting twice. (Note: that the thin silvery metal bar in the Makerbot toolkit is designed to be used as a spacer for this.) Should be done up nice and tight now though.
- Continual tweaking of z-stage stepper strength, now at about 75%
- Accidental Z-stage/build platform collision required re-levelling of Z-stage (seems the best way to do this is by releasing one of the Z idler pulleys and twisting the studding, instead of fiddling with the nuts). Seems pretty smooth now.
- X belt tension was too low, there was a lot of slop. It's pretty tricky to get it tight enough.
- Lots of bolts on the XY stage were loose! This makes a horrendous racket when it's actually printing at full speed... Tightened them up
- Packed both X runner bars with hot glue, they were also moving about and making a racket.
- I managed to make it print 1/3rd of a shot glass, then it crashed. (About 60,000 gcode commands/30mins in.) Need to know what firmware to put on it to stop the crashing.
Following changes over skeinforge 0006 defaults are active (on my laptop):
 Feedrate: 27.0 mm/s
 Base Layer Thickness over Layer Thickness:  1.5
 Interface Layer Thickness over Layer Thickness: 0.8