Difference between revisions of "Equipment/Stratasys FDM 1650"
m |
m (Ms7821 moved page Stratasys FDM 1650 to Equipment/Stratasys FDM 1650) |
(No difference)
| |
Revision as of 12:29, 23 May 2013
| Equipment/Stratasys FDM 1650 | |
|---|---|
 | |
| Sub-category | CNC |
| Status | Under construction |
| Consumables | Printer filament |
| Training requirement | Yes |
| Training link | #Training & instruction |
| Owner | LHS |
| Origin | Donation |
| Location | Basement, CNC area |
| Maintainers | Hipster |
Description
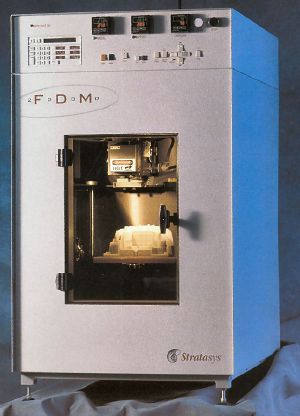
The Stratasys is a commercial-grade 3D printer that was donated to the LHS by Imperial College London. It was repaired for a time, but is currently undergoing an extensive refurbishment to bring the electronics up to modern standards and properly convert it to non-vendor-specific feedstock.
Specification & documentation
As the Stratasys is undergoing extensive modification to it's control electronics, material use requirements and printheads, the factory specifications and original instructions for use are unlikely to remain accurate once refurbishment is complete. The previous specifications and instructions will likely be updated at that time.
Broadly, the only things likely to remain the same is the large 11x11x11inch printing volume, the dual-head extruder setup, controlled printing enclosure, and high-resolution industrial mechanics.
Original docs
UK reseller is http://www.laserlines.co.uk/. This one may have come direct from Stratasys, though.
- Extensive blog on the 1650 and 2000
- Manuals for an FDM 2000 (includes description of Quickslice 5.0 - 1997):
- Page referencing these and C:\QuickSliceV64-qsni
- Calibration file
- Webcams
- Another 1650 owner
- Repairing an FDM 2000
- Insight User guide (2005)
- Stratasys product page (1999)
- Philadelphia hackspace with an FDM 2000
Training & instruction
For pre-refurbishment instructions & settings, see the legacy sub-page here: Stratasys_FDM_1650/Legacy#Training_.26_instruction
Consumables
If using any consumables, link here to recommended providers or current pledges to purchace.
Log
Original use
For pre-refurbishment logs, see the legacy sub-page here: Stratasys_FDM_1650/Legacy#Logs
Refurbishment
TODO
- 1.
Remove all the unnecessary wiring, including the old heater tubes.16-05-2013 - 2.
Identify the wiring on the steppers (these are wired differently to normal).16-05-2013 - 3. Connect the motors to the 4pi (http://wiki.arcol.hu/blog:4pi) and calibrate the settings.
- 4. Redesign the head end for 2 hot-ends and extruders.
- 5. Connected hot ends and run heat and thermistor checks.
- 6. Filament path checks.
- 7. Install Raspberry Pi with Octoprint.
- 8. Calibration test print.
- 9. Heated bed design (required for ABS), phase 2.
16-05-2013
To the mailing list:
Hey all.
Right, finally got time today to do a thorough check-up on the stratasys. As I have rpreviously said, all internal mechanics (including the steppers) are in full working order, especially as I performed a strip and clean to it pre-move.
After a quick talk with Ian on Wednesday, I have traced all the cables and found all the documentation for the parts, ferrous detecting end-stops, x-y controller pin outs, steppers etc. I have removed the old and power hungry heaters and flourescent lights.
I have paird the stepper cables and made ready for the 4-wire board. Also gave another clean
Basically it is ready to be connected to control board and ready to run.
All we need now are to nice tourqey nema17 steppers, 2 j-hotends (ian has offered to source and will start pledge, less than £100). Once these have turned up and I've cad modeled them, i will design a nice clean and easily accesable mount for them in the existing hot end housing (also been cleaned).
Charles will need to add a ACNode and it'll be up and running as a tool for the space. But like the laser cutter and charles, I will be its main care-taker/daddy lol.
Hope this has cleared up any concerns or apprensions about having a fully working, accurate, industrial 3D printer in the space to be used by people with training.
Regards
Hipster
Links
Training
- A course on this machine
Modification
- Lengthy description of the print process (for automation)
- Modification for makerbot-style self-supporting objects
- Using makerbot parts