Laser Cutter/Instructions/Photo Engraving
< Laser Cutter | Instructions
Jump to navigation
Jump to search
Revision as of 00:26, 31 May 2014 by KantPredict (talk | contribs)
The printable version is no longer supported and may have rendering errors. Please update your browser bookmarks and please use the default browser print function instead.
This page will explain how to get the best quality engraving results out of the software that is already available on the Hackspace computers, namely GIMP for the editing and LaserCut for the actual engraving.


How To Process The Images
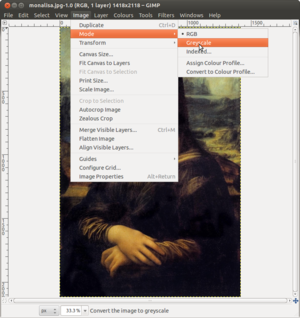
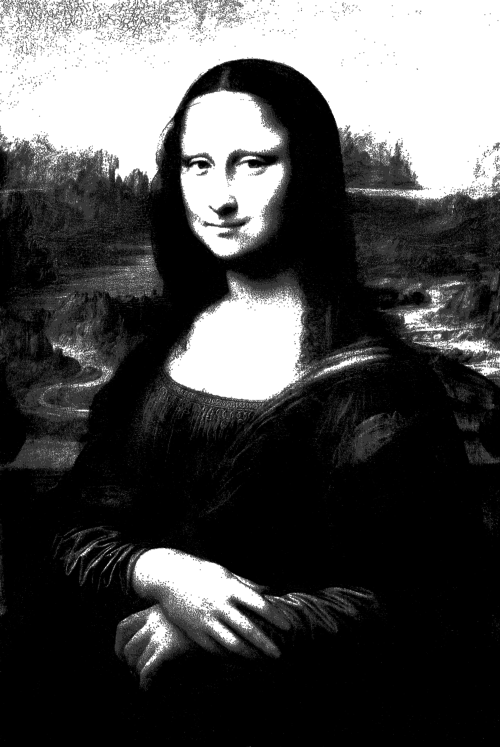
- You begin by importing the file you want to engrave into the GIMP editing software. Most, if not all of the Hackspace computers have this installed. In this example, I've used the Mona Lisa.
- You will want to reduce the image to greyscale for processing.
- Any colour correction is best done at this stage while the image is still at it's original resolution.
For example, adjusting the contrast so that darker areas are much brighter so that you don't and up with large areas of entirely black wood.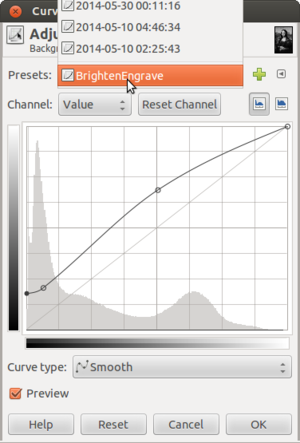
- Before engraving your image, you will want to specify the actual size you wish to engrave it and the resolution in DPI.
Changing 'pixels' to millimetres' in the dialog box allows you to do this; it will automatically adjust the number of pixels required.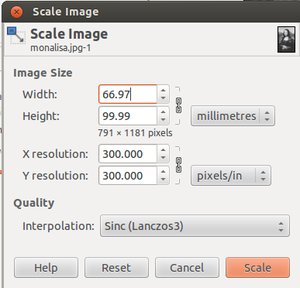
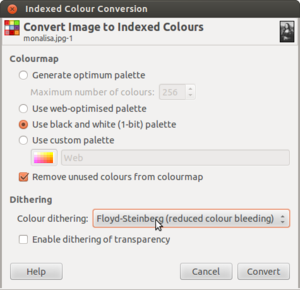
- To produce the required dithering effect necessary to engrave colour gradients, you need to go to Image -> Mode -> Indexed... and use the settings pictured.
- You should end up with something like the effect shown here (enlarge for detail on the dithering):
- Finally, save the image as a .PNG file, either to a memory stick or the space on colin -> /lasercutter network share - supposedly you can import BMP and JPEG files but I've yet to see it complain about a PNG file.


Setting Up the Laser Cutter
- Now that you have processed your image, you need to use the Import... command in the File menu in the LaserCut software on the laser cutter computer.
- Once the file is imported, you need to resize it to the dimensions that you specified in GIMP, as LaserCut seems to enlarge them upon import.