Difference between revisions of "Project:Lockpicking/Inside lock"
Jump to navigation
Jump to search
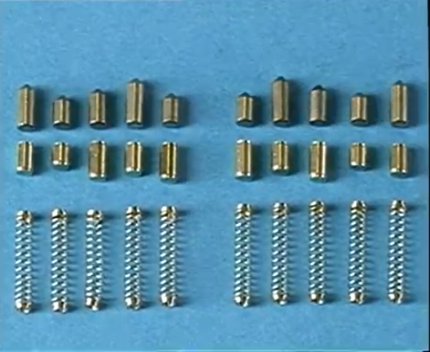
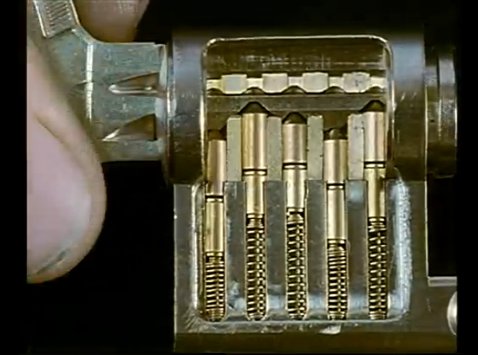
The inside a lock is made of the following: 10 springs (under much tension), 10 bottom pins and 10 top pins. On each side of the lock there would be five pins (some locks have more than five pins on each side.)
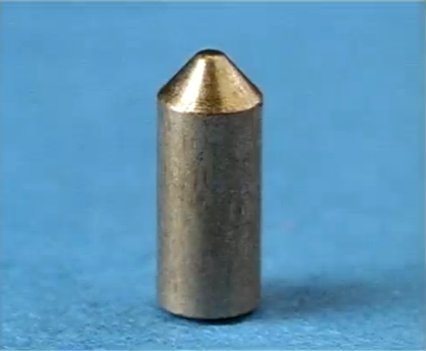
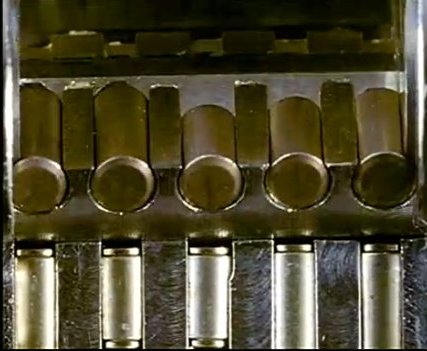
Here a view of the top pin. The top pin varies in length but it usually the same form.
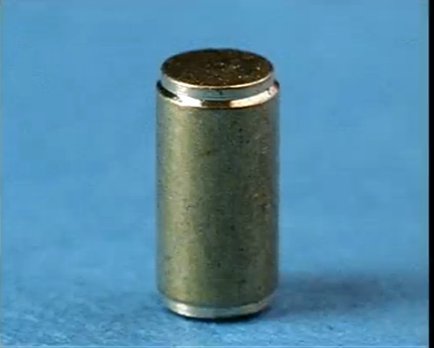
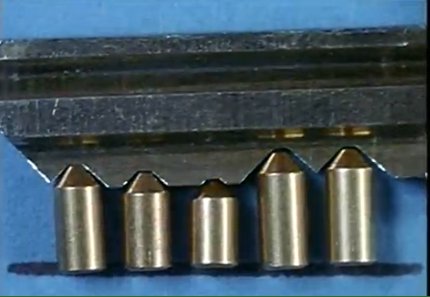
Here is a view of the bottom pin. The bottom pin varies in length like the top pin, however, the bottom pin have more variations in form than the top pin. This pin is what we call a spool pin. These variations make lockpicking more difficult rather than the pin just having a straight form since these pins get stuck in the lock much easier than pins just with a straight form.
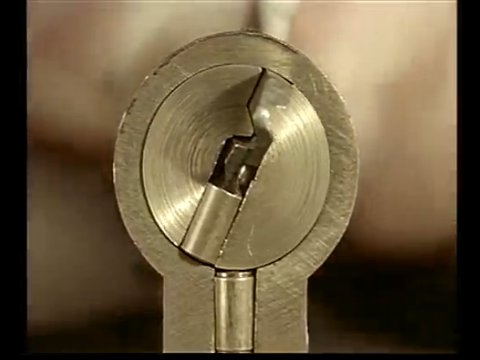
Here we can see the top pins, the bottom pins and the springs in a lock. At the present state, the lock is locked and cannot be opened since the pins are blocking the shear line. In order for a lock to open, all pins must be aligned at the shear line.
Here we have yet another view of the top pin, bottom pin and the spring. Here we can see clearly that the bottom pin is blocking the shear line and thus the lock cannot open.
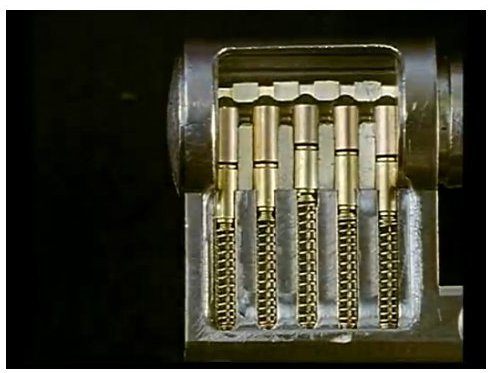
In order for a lock to open, all pins must be aligned on the shear line. This is the function of the key. The cuts in the key correspond to the length of the pins inside the lock. This image shows five top pins aligned neatly to the key above.

In this image, we can see that the right key is inside the lock. We see that all the pins are aligned neatly. We can see that there is a space between the top and bottom pins which we call the shear line. In the present state, the lock can turn and open since no pins are blocking the movement of the lock.
This image shows us the lock opening since all the pins are neatly arranged at the shear line. The key has two functions: 1) to align the pins at the shear line and 2) with tension, to turn the lock open.
Here we see the right key in the lock and we see that all pins are aligned neatly on the shear line and that there are no pins blocking the lock. Thus, the lock can turn open
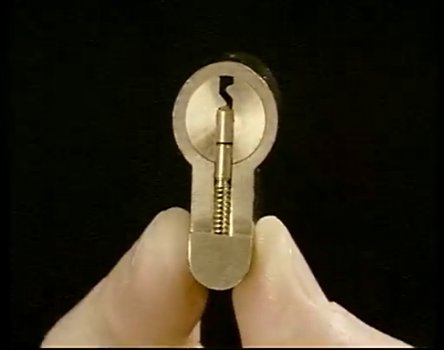
In this image, a wrong key is in the lock. You can see clearly that the shear line is blocked. The shear line is blocked by either the top pin or the bottom pin.
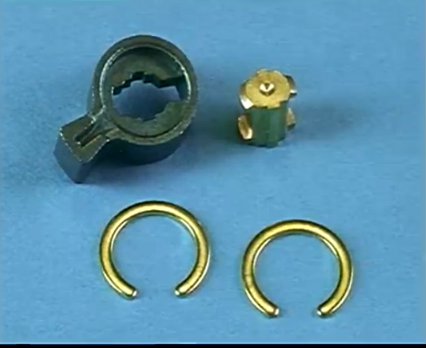
These are the middle parts of the euro cylinder. In order to take apart the lock, the two rings on either side must first be removed. Be very careful when taking out the plug of the lock as the springs are under much tension and if not properly blocked, will pop out and land somewhere where you can't find them!
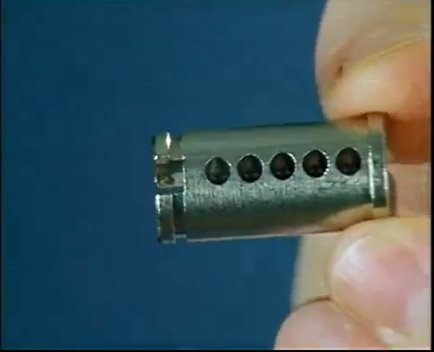
This is the plug of the lock. This part of the lock turns only when all pins are neatly aligned on the sheerline. Notice that the five holes are not totally in a straight line.
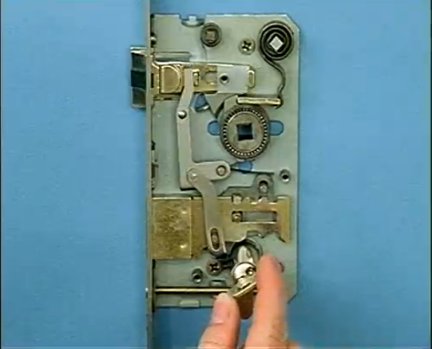
We see here how the lock moves a lever which disengages the lock so that the door can open. It should be noted this design has not changed very much since the 19th century when it was first designed in Germany.
m (moved Inside lock to Project:Lockpicking/Inside lock) |
m |
||
| Line 99: | Line 99: | ||
<br> | <br> | ||
| + | [[Category:Guides]] | ||
Latest revision as of 21:38, 28 May 2013
Inside a Lock
Have you ever wondered (or cared) what is inside a lock? How does a lock close and how does a lock open? For this example, we have taken a "eurocylinder" The eurocylinder is the most used door lock in Europe.
Overview of inside a lock


The Pins Inside the Lock


Function of the key inside the lock


Example of the Wrong Key in a Lock

Other parts of the Euro Cylinder


How does the lock open the door?
