Difference between revisions of "Project:Nanode/Building a Nanode"
Jump to navigation
Jump to search
| Line 2: | Line 2: | ||
Here's how to build up a Nanode as a step by step guide. It should take you a couple of hours. | Here's how to build up a Nanode as a step by step guide. It should take you a couple of hours. | ||
| + | |||
| + | ''Step 1'' | ||
First identify the kit contents | First identify the kit contents | ||
| Line 10: | Line 12: | ||
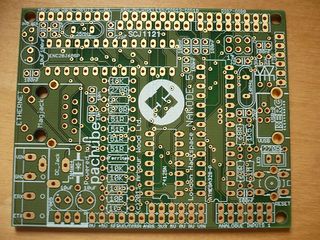
[[File:Nanode5_topside.jpg|320px|right|thumb|Version 5 Nanode - Component side of pcb]] | [[File:Nanode5_topside.jpg|320px|right|thumb|Version 5 Nanode - Component side of pcb]] | ||
| + | |||
| + | ''Step 2'' | ||
Now orientate the board so that writing is like this. | Now orientate the board so that writing is like this. | ||
Revision as of 20:18, 1 June 2011
Building a Nanode - in Words and Pictures
Here's how to build up a Nanode as a step by step guide. It should take you a couple of hours.
Step 1
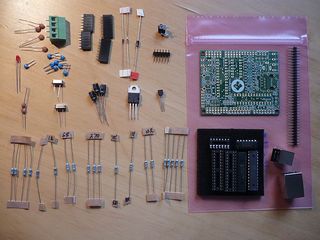
First identify the kit contents
Here you see all the resistors, capacitors, connectors, crystals and ICs needed to make the standard build of Nanode 5.
Step 2
Now orientate the board so that writing is like this.
This is the basic starting point for the build sequence. The pcb is built in an orderly sequence starting with the resistors and small components that are low on the board and then working up to the bulkier parts like connectors.
First we add the 5 10K resistors - the colour code is Brown Black Black Red (The last band on all resistors is Brown).

