Project:The Internet: Difference between revisions
From London Hackspace Wiki
| Line 33: | Line 33: | ||
# Hot glue Red 5mm Flashing LED into bezel. | # Hot glue Red 5mm Flashing LED into bezel. | ||
# Attach bezel to ABS box. | # Attach bezel to ABS box. | ||
# Solder wires to contacts of CR2032 battery holder. | # Solder wires to contacts of CR2032 battery holder, may require scuffing the contacts of the holder and wiping with flux. | ||
# Hot glue CR2032 battery holder into lid of ABS Box. | # Hot glue CR2032 battery holder into lid of ABS Box. | ||
# Solder resistor to Red 5mm Flashing LED. | # Solder resistor to Red 5mm Flashing LED. | ||
Revision as of 00:51, 2 March 2012
| The Internet | |
|---|---|
| Created | 08/02/2012 |
| Members | Montyphy |
| QR code | |
Description
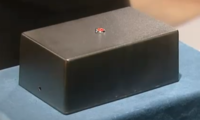
As featured in 'The IT Crowd', the internet is surprisingly small, wireless, and, due to not weighing anything, really light.
Status
- Sourcing components - Complete
- Construction - Complete
Components
- ABS Box H2852 = £4.89
- 5mm Red Flashing LED = £0.38
- 5mm LED chrome bezel = £0.92
- CR2032 battery = £0.22
- CR2032 battery holder = £0.90
- 1.2K Resistor
Total = £7.31
Instructions (for Dummies)
- Drill 8.1mm hole in top of the ABS Box.
- Remove Orange 5mm LED from bezel with the aid of heat gun.
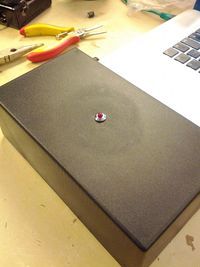
- Hot glue Red 5mm Flashing LED into bezel.
- Attach bezel to ABS box.
- Solder wires to contacts of CR2032 battery holder, may require scuffing the contacts of the holder and wiping with flux.
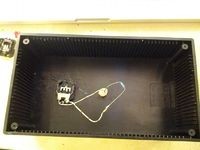
- Hot glue CR2032 battery holder into lid of ABS Box.
- Solder resistor to Red 5mm Flashing LED.
- Solder wires of CR2032 battery holder to Red 5mm Flashing LED and resistor, ensuring the middle pin of the CR2032 battery holder is soldered to the short leg of the Red 5mm Flashing LED.


