Project:Clark Trailer Mast: Difference between revisions
From London Hackspace Wiki
No edit summary |
(→Work Required: updated with unbending segment and screw grinding) |
||
| Line 76: | Line 76: | ||
* Strip existing paint and rust | * Strip existing paint and rust | ||
* Rustproofing | * Rustproofing | ||
* Replace all seals and serviceable components | * Replace all seals and serviceable components | ||
** £165 + vat + delivery for a complete set of seals, O-rings, and grease. Need to provide measurements to Clark. | ** - this is where we were having trouble - turns out the screws are a little too long and we need to fix this (either by reorder or by grinding down the screwtips 0.5mm) | ||
** - £165 + vat + delivery for a complete set of seals, O-rings, and grease. Need to provide measurements to Clark. | |||
* Unbend the bent antenna segment or replace from donor SCAM mast | |||
* Painting with a suitable exterior grade paint | * Painting with a suitable exterior grade paint | ||
Revision as of 11:25, 17 March 2015
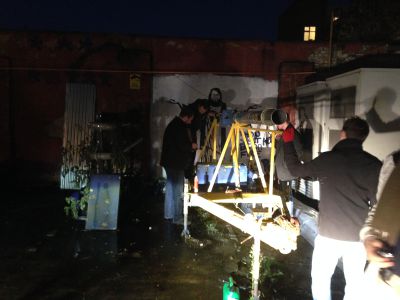
30m Clark trailer mast.
Specifications
| Trailer/Mast Specifications | |
|---|---|
| Make | Clark Masts |
| Model | 63/100 Trailer Mounted Mast |
| Age | Manufactured during the 1970s |
| Extended Height | 30m (100') |
| Antenna Attachment | Standard Socket 24mm diameter
(Currently has a pole lodged in it) |
| Trailer Length | 5.9m |
| Trailer Width | 1.9m |
| Trailer Height (with mast stowed) | 1.8m |
| Trailer Wheel Size | 185/80R15 Tyres + innertubes |
| Maximum Recommended Headload | 11.4kgs (Over 20m extension)
27 kgs (Under 20m extension) |
| Maximum Safe Windspeed | 16 km/h (Unguyed)
96 km/h (Guyed with middle and top guys) |
| Picket Radius | 18m |
| Nett Weight (Mast + Trailer) | 1,088 kgs |
| Time to Extend | 10 mins |
| Time to Retract | 6 mins |
| Engine Specifications | |
| Compressor Make | Clark No. 2 Single Cylinder 3" Bore x 44mm Stroke |
| Engine Make | 2hp Briggs & Stratton 4 Stroke Single Cylinder |
https://docs.google.com/drawings/d/1m7stWPsxvypnEcJHj0fhJH8rFikoyqbqeej_nzJeFTo/edit?usp=sharing Link to (rough) schematics of mud guards that need to be remade
Work Required
(This is in some sort of vague order)
- Strip existing paint and rust
- Rustproofing
- Replace all seals and serviceable components
- - this is where we were having trouble - turns out the screws are a little too long and we need to fix this (either by reorder or by grinding down the screwtips 0.5mm)
- - £165 + vat + delivery for a complete set of seals, O-rings, and grease. Need to provide measurements to Clark.
- Unbend the bent antenna segment or replace from donor SCAM mast
- Painting with a suitable exterior grade paint
- http://www.hammerite.co.uk/products/direct_to_rust_metal_paint_smooth_finish.jsp - Hackspace blue!
- The original colour was Caterpillar Yellow BS G88/0668. Might be nice to get it in original condition.
- Welding/fabricating replacement parts where required, i.e. wheelarches, reflector arms
Paint Stripping
There is some Nitromore in the engine compartment and some rubber gloves in Velyks's memberbox. Directions for use:
- Pour amount into metal bucket
- Dab on a thick layer over painted surface so it's all covered
- Leave for 40 mins
- Use scrapers to scrape paint off
- Clean brush and bucket when you're done
Try and work from the back towards the front.
ALWAYS WEAR THE SAFETY GLOVES AND CLEAN OFF ANY GUNK YOU GET ON YOUR SKIN. THIS SHIT IS NASTY
Replacement Screws
We might as well replace some of the knackered screws. Especially as we damaged some removing them.
- 3/8" BSF x 5/16" Allen Socket Screw
- Qty: 85
- 2 BA x 9/16" Ch. Hd. Steel Screw
- Qty: 86
- 2 BA x 1/2" Csk. Hd. Steel Screw
- Qty: 60
Future projects
- Replace raising crank with electric motor?
- Electric start compressor engine?
- Replace petrol engine with electric motor?
