Project:Clark Trailer Mast
{{#ev:youtube|RBOgETpvSto|480|right}}
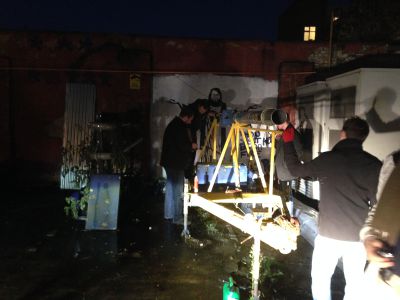
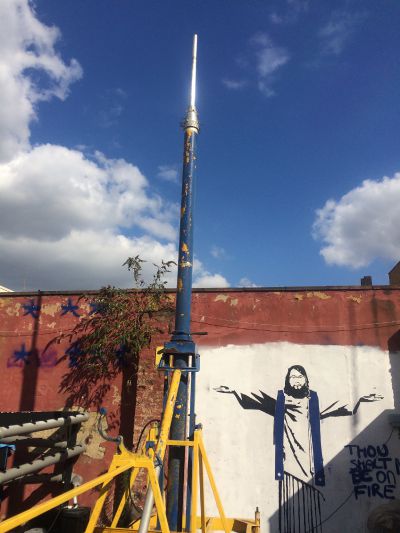
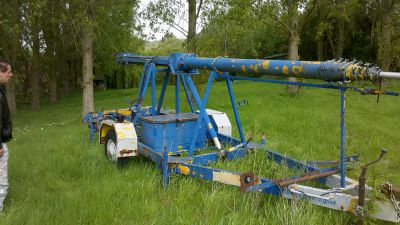
The London Hackspace has a 30 metre trailer mast currently living in the yard.
It was donated to us in a bit of a worn down condition after sitting in a field for many years. It was originally used by a utility company and repainted in company colours as each utility company rebranded or was acquired. The intended use of the mast is to use it to improve our radio signal propagation/reception at the Hackspace, provide useful utility during field day activities and festivals like Electromagnetic Field and more. The mast can also house a camera and even be configured for semi-permanent mounting.
During the time since acquisition, we've had various challenges from procuring the right parts to having sunny days to service the equipment, but we are getting there. For a long time work was stalled due to a bent segment and replacement screws that turned out to be slightly too long once screwed into the assembly but that's been resolved and the mast can be raised although there's still a lot of work to restore complete functionality and prepare it for winter.
Even though this trailer is maintained by the amateur radio club, once finished, we can share its use with related LHS groups (e.g. quadcopter obstacle course, brain hacker nodule pole, etc.). This mast will require a small amount of training - do not attempt to use if you're untrained as it can easily fall over and cause substantial damage and jeopardise the Hackspace's very existence.
The Clark 63/100 is the taller, older trailer-mounted sibling to the Clark SCAM-12 Mast.
Specifications
| Trailer/Mast Specifications | |
|---|---|
| Make | Clark Masts |
| Model | 63/100 Trailer Mounted Mast |
| Age | Manufactured during the 1970s |
| Extended Height | 30m (100') |
| Antenna Attachment | Standard Socket 24mm diameter
(Currently has a pole lodged in it) |
| Trailer Length | 5.9m |
| Trailer Width | 1.9m |
| Trailer Height (with mast stowed) | 1.8m |
| Trailer Wheel Size | 185/80R15 Tyres + innertubes
(nut size: 7/16" - but works with 19mm? hex in space) |
| Maximum Recommended Headload | 11.4kgs (Over 20m extension)
27 kgs (Under 20m extension) |
| Maximum Safe Windspeed | 16 km/h (Unguyed)
96 km/h (Guyed with middle and top guys) |
| Picket Radius | 18m |
| Nett Weight (Mast + Trailer) | 1,088 kgs |
| Time to Extend | 10 mins |
| Time to Retract | 6 mins |
| Engine Specifications | |
| Compressor Make | Clark No. 2 Single Cylinder 3" Bore x 44mm Stroke |
| Engine Make | 2hp Briggs & Stratton 4 Stroke Single Cylinder |
Work Required
Updated Sep 2015
Things to procure
- Need proper pressure gauge (new one was wrong fitting)
- Need pneumatic bits
- hoses
- connectors
- electric compressor
- Need ladder
- Need more paint
- Need mast-turning handles (wood brittle)
- Need jack handle (missing wood)
Buy some WD-40?- Buy trailer electrics
- Buy a post-level (bubble indicator)
- Buy LED strips and Swarovski crystals for decorations
- Buy 30+ metres of feeder cable (UHF and HF feeders)
Things to do
- Painting the remaining blue bits
- Cleaning and refitting the collars
Lubricate the moving parts (legs, axels, screw threads, etc)- Mount the wheel arches
- Refurbish the guy rope box
- Repair/remount the engine box hinges
- Sort through the plastic gubbins box
- Review road-worthiness (including the following but not limited to:)
- Brakes
- Wheel hubs
- Tightness of bolts
- run cable between mast top (fully erect) and shack
Pre-existing To-Do Items
- Strip existing paint and rust
- Rustproofing
Replace all seals and serviceable components- -
this is where we were having trouble - turns out the screws are a little too long and we need to fix this (either by reorder or by grinding down the screwtips 0.5mm) - -
£165 + vat + delivery for a complete set of seals, O-rings, and grease. Need to provide measurements to Clark.
- -
Unbend the bent antenna segment or replace from donor SCAM mast
- Painting with a suitable exterior grade paint: PARTIALLY COMPLETE
- http://www.hammerite.co.uk/products/direct_to_rust_metal_paint_smooth_finish.jsp - Hackspace blue!
- The original colour was Caterpillar Yellow BS G88/0668. Might be nice to get it in original condition.
- Welding/fabricating replacement parts where required, i.e. wheelarches, reflector arms
Paint Stripping
There is some Nitromore in the engine compartment and some rubber gloves in Velyks's memberbox. Directions for use:
- Pour amount into metal bucket
- Dab on a thick layer over painted surface so it's all covered
- Leave for 40 mins
- Use scrapers to scrape paint off
- Clean brush and bucket when you're done
Try and work from the back towards the front.
ALWAYS WEAR THE SAFETY GLOVES AND CLEAN OFF ANY GUNK YOU GET ON YOUR SKIN. THIS SHIT IS NASTY
Replacement Screws
Done! We used 2BA x 1/2" stainless steel slotted cheesehead at £15/100 which proved to be just long enough.
We might as well replace some of the knackered screws. Especially as we damaged some removing them.
- 3/8" BSF x 5/16" Allen Socket Screw
- Qty: 85
- 2 BA x 9/16" Ch. Hd. Steel Screw
- Qty: 86
2 BA x 1/2" Csk. Hd. Steel ScrewQty: 60
Paul Sladen March 2015 Visit Notes & Response
Manage the easy stuff first, perhaps bring in the top two pieces indoors of the mast and work on the bits inside:
- be mindful that the screws may be too long (even by a millimetre – we do not want the screws to scratch the tubes by being too long – be prepared to lathe them down on the end. It ended up being the case. Bought shorter screws, did the trick.
- The easiest of the tubes may be easiest to manage (start small and build up) The largest were easiest - the smallest was the bent one. Thanks to Andy and about 12 tonnes of pressure, we got it straightened again.
- If the tubes are bent, it may be reasonable to actually shorten the tubes themselves to make it work better – i.e. a compromise tube will be better to do that way as well and won’t be a major impact to antenna abilities This was a last-resort consideration - very lucky we were able to bend the span back.
- Get the mast actually working in a limited fashion – could we get the bottom two to work and use that as a temporary setup? That would be our workaround temporarily. Use massive jubilee clamps to fit things together perhaps? (Let's just keep fixing things up)
- While using the mast at the space: Use an electric compressor – much easier to manage accordingly than the petrol 20psi compressor that’s there. Equivalent of a Chinese 230v / 12v jobby would make sense – note that we need a volume of air instead of the high pressure tank to move these segments up. (Remember these original designs are meant for soldiers with hand-pumps to pump up the mast in battlefield) This is still planned, especially as we have a SCAM12 mast that will need this.
- Clark Mast designs haven’t changed for 50 years – the 127.0mm spec tubes are actually imperial sizes that have been around for a long time.
- The locking collars that we have are completely optional – they will hold the tower but they should not be depended on because they might bring water in, they are just for static setups and could get us in trouble if/when it goes below freezing.
- These particular masts of similar were often used for ‘birds eye views’ of properties in addition to the typical comms requirements we'd expect them to have - the era before GPS-stabilised drones carrying impressive cameras.
- Note - Locking collars inside the shack are not spinning freely – they should be able to screw out and in without any trouble. This could be a small project to get them freely moving.
- Consider painting them as a rainbow to keep track of the bits and segments – we have a tough time understanding the pieces/segments are corresponding to which part.
Future projects
- Replace raising crank with electric motor? How hard is it to crank up? It is not hard to crank up. Keep it manual!
- Replace petrol engine with electric motor? Yes - we'd share between the two masts and be quiet during the night hours.
References / External Links
- File:TrailerMastManual.pdf
- Original pledge wiki page for replacement parts
- Paul Sladen's SCAM mast info website - Note that the SCAM mast is a cousin of our WT8 mast in the Clark 63/100 trailer assembly.
- 2E0IJK's SCAM12 Repair Site - Mast refurbishment notes plus a piston reassembly video
- Clark Masts Historical site
- Clark Masts Official Website
- SV2GWY's SCAM12 antenna setup - He shows how to apply the air pressure, lock/unlock tower segments, etc.
- Link to (rough) schematics of mud guards - was easier to buy new ones.


