Equipment/VinylCutterOld: Difference between revisions
(Speed control) |
(I left some vinyl cutter consumables in the space) |
||
| Line 111: | Line 111: | ||
==Consumables== | ==Consumables== | ||
There is a [[Pledges/Vinyl|pledge]] running for the purchase of more vinyl. | There is a [[Pledges/Vinyl|pledge]] running for the purchase of more vinyl. | ||
I have left a small roll of blue vinyl (about 4m) and a large roll of black vinyl (about 47m) in the space. There is also a roll of medium-tack application paper, about 30cm wide. Feel free to use small amounts of these. If you want to use larger quantities, please let me know. --21:55, 5 July 2011 (UTC) | |||
Revision as of 21:55, 5 July 2011
Status
- I have had a certain amount of success running the cutter with a serial connection from Inkscape under Linux. More messing around is needed.--Artag 13:32, 19 August 2010 (UTC)
- I have gotten the cutter to reliably cut reasonably complex shapes (see image to the right). See http://github.com/muz/Ruby-PNC950. Looks like the serial port needed negotiating correctly.--Muz 20 August 2010.
- I used the cutter on 5th July 2011. It had a problem where the carriage for the cutter was sticking in the "up" position for about 0.25s after the "pen down" command was sent to it — this was making it miss most of the first cut of each section. The problem was fixed by taking the cover off the carriage (single black cross-head screw) and applying WD-40 to the point where the carriage meets the adjustable end-stop screw at the left. (Try to push the carriage down gently by hand a few times and you'll soon see where the sticking point is.) The WD-40 and, presumably, whatever contaminant was making it stick was removed using kitchen paper. --21:36, 5 July 2011 (UTC)
Model
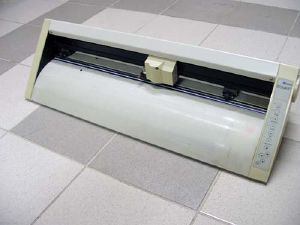
- Roland CAMM-1 PNC-950. PDF manual, FAQ.
Specifications
- It holds up to 610mm (24") media and cuts up to 584mm ( ~23").
- Length is essentially unlimited as it can use roll-feed media but seems to be restricted to 25m.
Instructions
Read the fucking manual. It's quite good.
Quick setup guide
- Set inkscape to HPGL output. File > Save As > HPGL format.
- Draw your figure.
- Connect the cutter via USB to Lovelace. This is done with a serial port converter from 25-pins -> 9-pins -> USB. There should be a converter on the same shelf as the cutter (be sure to check behind it), or you may find one attached to the old console in the quiet room.
- Load vinyl from behind, making sure that it is flush with the left edge and has some slack for being pulled to and fro.
- Turn on the cutter, the cutter head should fly to the right edge.
- Press Setup, cutter parks at left.
- Move cutter if necessary with cursor buttons, press Origin Set to mark lower right corner of drawing
- Run '~/serialshite.rb <HPGL filename>' from a Terminal.
It should be possible to enable the serial port as a printer and print direct to it, but I found this produced cutter errors (flashing power light) and no cut.
- I didn't need to use the Ruby script. I just made sure the serial port was at 9600bps, 8N1, RTS/CTS flow control enabled (stty sane </dev/ttyUSBwhatever, then stty crtscts </dev/ttyUSBwhatever) and then did cat filename.hpgl >/dev/ttyUSBwhatever. --21:49, 5 July 2011 (UTC)
The following file was generated by inkskape for a star shape. This works.
IN;
SP1;
PU3999,6429;
PD2693,5186;
PD929,5557;
PD1707,3932;
PD809,2369;
PD2596,2606;
PD3805,1269;
PD4131,3042;
PD5776,3778;
PD4191,4636;
PD3999,6429;
PD3999,6429;
PU;
Creating Images for Cutting
Converting an existing SVG
For some reason, Inkscape doesn't like going straight from SVG to HPGL. This can be fixed by:
- Open up the SVG file
- File > Save As > select the DXF file format.
- Open the DXF
- File > Save As > HPGL
- I didn't find this step necessary with a recent (0.48.1-2ubuntu2) version of Inkscape. It was happy to save in HPGL after loading a SVG. --21:41, 5 July 2011 (UTC)
Creating your own image in Inkscape
Inkscape seems to play nicely if you just create a new image and lay down some paths or polygons of your own. You can save this data for the cutter by just going to File > Save As > HPGL. Things like text will need converting to paths before saving (select the text, then Path -> Object to Path), otherwise they won't show up in the HPGL output.
Avoiding overloading the cutter with TOO MUCH DATA
The cutter doesn't seem to happy when it recieves a large set of instructions in one fell swoop. As such, it is highly recommended that you format your HPGL files nicely.
- vim yourhpglfile.hpgl
- <Esc>
- :% s/;/;<C-x><C-m>/g
- <Return>
- :wq
This will place each command on its own line, and in the case of more complex drawing patterns, avoid having the cutter throw a hissy fit and get confused.
(In emacs: load the .hpgl file, and make sure the cursor is at the start of the buffer. Then M-x replace-string, replacing ';' with ';C-QC-J' (that's semicolon, ctrl-q, ctrl-j) to add newlines after each semicolon.)
Setting the cutting speed
At the start of your HPGL file you should have at least two commands: IN; and SP1; (for "intialise" and "select pen 1"). If you add another command VS after these you can choose the cutting speed. VS1; is the slowest and VS40; is the fastest. Reducing the speed may be useful if your design has lots of fine detail.
DIP switch 8 can also be used to reduce the cutting speed (it's set to "very slow" if it's set to "ON" when you turn the cutter on), but it's a bit of a blunt instrument. Inserting a VSnn; command into your file gives you much finer control. --21:53, 5 July 2011 (UTC)
Tips
- Sometimes the cutter refuses to print or respond to any buttons. This hasn't happened since I opened a door in the bottom of the printer and poked an EPROM there, so may be due to some poor internal connection.
- On the right side of the cutter is a switch for cut strength, which controls how much force is used by the blade. I don't know why you wouldn't want to keep this on maximum.
- The cutter will cut thin paper OK, but there's a risk of tearing.
- If your cut fucks up you can hit "pause", remove the vinyl, and then press "pause" again. AFAIK there's no harm in letting it run without any vinyl loaded.
Serial cable
The serial cable (blue, with a 25WD at one end and a 9WD at the other) is connected as follows :
| Cutter, 25 pin male D | PC, 9 pin female D | Use |
| pin 2 | pin 2 | PC RXD from cutter |
| 3 | 3 | PC TXD to cutter |
| 4 | n/c | cutter pin 5, RTS CTS loopback |
| 5 | n/c | cutter pin 4, RTS CTS loopback |
| 7 | 5 | ground |
| 20 | 8 | cutter DTR to PC CTS, flowcontrol |
This provides for hardware (rts/cts) handshake. Software flowcontrol may be OK but the cutter manual suggests overrun may occur.
Consumables
There is a pledge running for the purchase of more vinyl.
I have left a small roll of blue vinyl (about 4m) and a large roll of black vinyl (about 47m) in the space. There is also a roll of medium-tack application paper, about 30cm wide. Feel free to use small amounts of these. If you want to use larger quantities, please let me know. --21:55, 5 July 2011 (UTC)

