Equipment/HPC LS3060 Laser Cutter: Difference between revisions
From London Hackspace Wiki
| Line 58: | Line 58: | ||
** Move the 'target' cursor and click on the location on your design where you wish to position the origin (this is usually at the top right of the design) | ** Move the 'target' cursor and click on the location on your design where you wish to position the origin (this is usually at the top right of the design) | ||
** You may also [[:File:Laser-Cutter-Screen-Origin-2.png|manually enter the position]] - the top corner of bed is located at (299, 559) | ** You may also [[:File:Laser-Cutter-Screen-Origin-2.png|manually enter the position]] - the top corner of bed is located at (299, 559) | ||
* | * Layers can be used in your design to provide combinations of different cut types and engrave options on a single piece. For example you may wish to cut out a key-ring and then engrave a name on it. | ||
** Each layer can be assigned different action, speed and power settings - consult the manual or the wiki for appropriate settings. | |||
** Finer control of layer power and speed settings is available by [[:File:Laser-Cutter-Screen-Cut-options.png|clicking on the layer]] | ** Finer control of layer power and speed settings is available by [[:File:Laser-Cutter-Screen-Cut-options.png|clicking on the layer]] | ||
* Upload the file to the design and settings to the laser cutter hardware as follows: | * Upload the file to the design and settings to the laser cutter hardware as follows: | ||
Revision as of 18:48, 24 October 2010
Status
The cutter is currently operational - check the logbook for more information.
Model
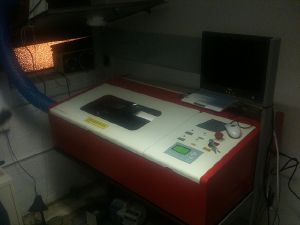
- HPC LS3060 "plus" laser engraver and cutter.
Specification
| Laser: | 40W - water cooled CO2 laser. |
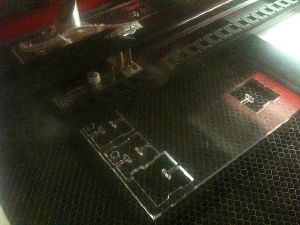
| Working area: | 320 x 600mm honeycomb bed (cutting area possibly about 300 x 550mm) |
| Features: | Air-assist (removes debris from cutting region),
red-dot pointer (to show beam location) |
| Water cooling: | Simple tube cooling circuit connected with (9mm OD, 6mm ID) latex tube.
Uses supplied submersible pond pump (2.8m head, 2800L/H flow). |
Manuals
Safety information
Please don't touch or fiddle with the laser cutter unless you've have been trained.
- Please don't affect the cooling system without consultation - overheating or rapid cooling can damage the laser.
- Never leave the laser cutter unattended - Your material may ignite, and an unchecked fire in the laser cutter could be both dangerous and costly.
- In case of fire - Use the CO2 extinguisher by the laser cutter first. Do not use the powder extinguisher unless you feel that you can't control the fire.
- Never cut PVC or chlorinated plastic - You should always know what material you are cutting, and chlorinated plastics should be avoided because they release chlorine gas when cut.
- Do not try to cut metal in the laser cutter - If you wish to mark the metal, please use "Thermark Laser Engraving Spray / Paste", or use anodised aluminium.
Instructions
These instructions are intended as a companion to laser cutter safety training - not a replacement.
Powering on
- Insert key and turn
- Always perform the following pre-checks:
- Check that there is a CO2 fire extinguisher immediately to hand.
- Check that the water pump is running
- Check that the extractor fan is on
- Caution: Be certain that the water coolant is at a suitable temperature.
- If you are unsure if the cutter has been used recently, or you have been using the cutter for an extended period of time (an hour or so) check the temperature of the water using the infra-red thermometer.
- If the water temperature is outside the acceptable operating range (22 ± 3 °C) then wait for the water to cool before using the cutter.
Uploading your data file
- TODO Different file types pros/cons
- Sometimes it's useful scale your design. The Laser cutter application allows for this but it's rather quirky:
- From the Laser software menu select 'Tools/Size'
- Calculate and enter your new widths/heights in Google/calc etc.
- The work-area in the LaserCut software is not an absolute representation of the laser cutter bed. The origin must be set relative to your design.
- From the LaserCut application menu select 'Laser/Set laser origin'
- Move the 'target' cursor and click on the location on your design where you wish to position the origin (this is usually at the top right of the design)
- You may also manually enter the position - the top corner of bed is located at (299, 559)
- Layers can be used in your design to provide combinations of different cut types and engrave options on a single piece. For example you may wish to cut out a key-ring and then engrave a name on it.
- Each layer can be assigned different action, speed and power settings - consult the manual or the wiki for appropriate settings.
- Finer control of layer power and speed settings is available by clicking on the layer
- Upload the file to the design and settings to the laser cutter hardware as follows:
- Select the 'Download' button
- Remove any existing files by selecting them and clicking 'Del all'
- Download (upload) your file by clicking 'Download current'
- You should hear the laser cutter machine beep.
Positioning your material
- Caution: Know your material - be absolutely certain that your material is safe to use in the laser cutter. If in doubt - ask. For unidentified plastics try this test method.
- Caution: There are a number of electrically live areas inside the cabinet towards the back. Be very careful when reaching around at the back as you may get a shock.
- Place the material on the cutter bed.
- The bed height must be adjusted to the thickness of your material. This can be done as follows:
- Press the 'Z' button on the control panel with your material on the bed.
- The display will show 'Z-Axis operate'
- Then press the 'Datum' button
- The display should now show 'Z-Axis datum' and the bed should move to the correct height for your material.
- To make sure that your design will be cut within the boundary of your material you can have the cutter mark out the bounding box with the red-dot pointer. Note that you must upload your design to the cutter before doing this.
- Click the 'Run box' button in the laser cutter application
- Observe the path of the red-dot pointer
Cutting
- Caution: Never leave the machine unattended. The laser cuts and engraves by burning the material so you must be present to deal with any fires should this process undesirably escalate.
- Turn on the air pump on the main control panel
- To begin cutting press the 'Start' button in the laser cutter application.
- Monitoring progress
- TODO What to watch out for
- TODO What to do in case of problems
- TODO What to try if the result is not what you expect
- Log your Laser Cutter use in the logbook
Parameters for different materials
If you found some sweet settings please share them here.
Cutting
| Material | Thickness (mm) | Speed (mm/sec) | Power (%) | Corner power (%) | Examples |
|---|---|---|---|---|---|
| Ply wood | 3 | ? | ? | ? | |
| Acrylic - Perspex | 4 | 3.5 | 100 | 21 | |
| Acrylic - Palglas | 3 | 6 | 100 | 21 | Cubauble |
Engraving
| Material | Speed (mm/sec) | Power (%) | Corner power (%) | Examples |
|---|---|---|---|---|
| Anodized aluminium (dyed black) | 450 | 90 | ? | LHS logo on black phone |
| Anodized aluminium (Macbook Pro) (Vector - in "cut" mode) | 100 | 100 | 80 | Russ's Macbook Pro |
Consumables
- HPC sheet products - Laser ply, perspex, engraving laminate - where we purchased the cutter.
- The Plastics Shop - mattp purchased the plastic for the first batch of Hackspace key rings from here.
- Hamar Acrylic Cuts to size, and is ~10mins walk from the space. Order by phone and it should be cut and ready to collect on arrival.
- Price guide 320x600x4mm (laser bed size) clear acrylic = £8.
- Acrylic-Online cuts to size - delivery £8.00. Price guide (incl. VAT):
- 320x600x3mm (laser bed size) clear acrylic = £3.84
- 320x600x4mm (laser bed size) clear acrylic = £5.12
- 320x600x5mm (laser bed size) clear acrylic = £6.29
Guide For bulk order Quote
(bed size sheets)
Acrylic (perspex)
- Clear:
- 10 x 1.5mm
- 10 x 3mm
- 10 x 5mm
- 5 x 10mm
- Solid: Black:
- 10 x 1.5mm
- 10 x 3mm
- 10 x 5mm
- Solid: Red, Blue (ea):
- 5 x 1.5mm
- 5 x 3mm
- 5 x 5mm
More information
- Some useful laser info from Adafruit - the settings section in particular gave a good idea of what we can expect.
- More information about the controller card used by the cutter
- For making boxes, you can use this script - recommended settings of "--bolt_length 13 --nut_multiplier 1.8" YMMV

