Nikon Super Coolscan 5000 film scanner: Difference between revisions
From London Hackspace Wiki
Futureshape (talk | contribs) No edit summary |
Futureshape (talk | contribs) No edit summary |
||
| Line 9: | Line 9: | ||
|acnode=no | |acnode=no | ||
|owner=Brent | |owner=Brent | ||
|location=Darkroom | |location=[[Darkroom]] | ||
}} | }} | ||
Revision as of 18:48, 16 May 2016
| Film Scanner | |
|---|---|
 | |
| Model | Nikon Super Coolscan 5000 |
| Sub-category | Darkroom |
| Status | Good working order |
| Training requirement | no |
| ACnode | no |
| Owner | Brent |
| Location | Darkroom |
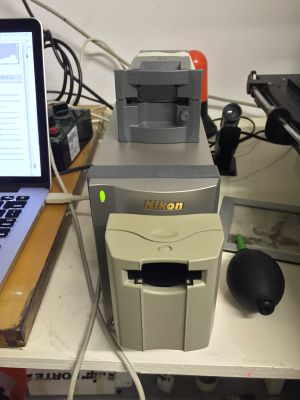
The Project:Darkroom group has a high-quality film scanner which works with negative/slide film (35mm) only.
The scanner is kept in a cardboard box under the darkroom sinks. The box has all the necessary cables (power, USB), the original manuals and software CDs, and even a few test negatives & slides if you'd like to experiment before scanning your own film.
You have 2 options if you want to use the scanner:
- Buy your own copy of VueScan for your laptop, which is a good idea if you're going to do a lot of scanning and want to use your laptop with other old scanners which are no longer supported in recent versions of Windows or Mac OS X
- Use the laptop that comes in the same box with the scanner - follow the instructions stuck on the laptop to log in and use VueScan which is installed on this laptop
Some scanning tips:
- By default, the resolution setting on Vuescan is set to 'Auto', which seems to produce around 5MP images. If you set it to 4000dpi, you can get around 20MP.
- If you're scanning film strips, they need to be up to 6 frames long. Just insert the strip in the slot until you feel that the scanner is pulling it in. From this point onwards, the film feed is controlled by the scanner software. Don't try to pull the film out, you will damage your film and/or the scanner. Use the Eject option in VueScan to get your film out.
- You can use the Batch Scan > List option in Vuescan to let the scanner automatically feed through and scan up to 6 frames at a time, without you having to click 'scan' for each one
- If the frames on your strip of negatives aren't evenly spaced (e.g. if you have a lomo-style camera with manual winding), you will have to experiment with the "Offset" setting in Vuescan to get the scanner to feed the film to the right position
- If you want to experiment with exposure later in Photoshop/Lightroom etc., best to set the VueScan output to TIF/DNG with 24 bits
You can read the full scanner manual for more information.