Archive:Shapeoko2
Summary
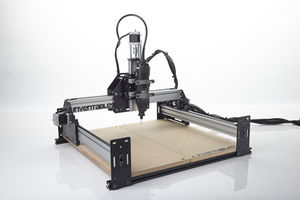
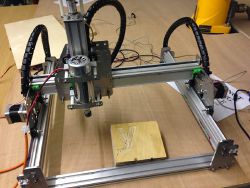
Shapeoko 2 is one of our CNC machines, it was aquired though a pledge.
Charges
Charges are 6 Pounds per hour (spindle time) due to the nature of G code and home built machines you do so at your own risk (this is used for development costs and maintenance of the CNC machines)- usage fee goes in blue cash tin, or paid into account sort code 779112 and account number 50365968, please use your Membership ID and date of use as a reference. (this is used for development costs and maintenance of the CNC machines)
Use
You will not use the machine unless you have received an induction You will not attempt to modify the system or attempt to bypass any elements of the "system" You will check the machine before use and will not use it if anything on it is not fully functional If when using it anything fails you will inform the CNC List https://groups.google.com/forum/?hl=en-GB#!forum/lhs-cnc
Things you will need to provide
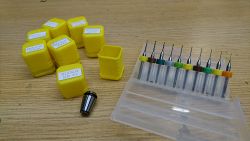
bits, and collets (ER11 size). Collets will hold your bit securely, a bit like a chuck on a drill, they get clamped onto the spindle with a nut, there's different sizes depending on the shaft of the bit that you're using, and because bits are easily broken, you can't expect to find sharp, and unbroken bits lying around the hackspace. Bring your own and take care of them. Collets get lost, so bring your own collets and take care of them.
Health and Safety
By using this machine you are self-certifying that you are competent to do so. You will not use this machine unless all safety features are in place and operational. You will not use this machine if you are under the influence of drugs or alcohol. (this will result in a life-time ban)
Status
Ready for use and has done a few jobs, although some "features" may be discovered by early users!
Induction
Details of the next inductionsession available ShapeOko Induction;
You will need to be able to do a CAD drawing and have an understanding of CAM before you attends, you can do this by research on the net and various tutorials, we recommend fusion 360 to learn the concepts
Updates
SHAPEOKO is no more, was destroyed long ago.
- 21-Jan-2016
First training sessions!
- 05-May-2015
Acnode installed and tested. Awaiting final device checks and extraction separator setup.
- 08-April-2015
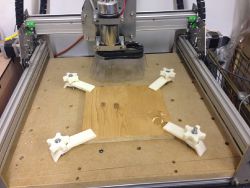
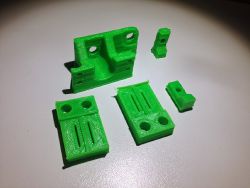
3D printed clamps *4 added to the Shapeoko.(8mm layer height).
- 12-March-2015
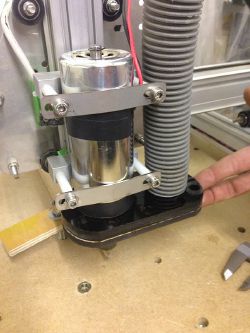
Dust Shoe prototype
- 09-March-2015
- 25-Feb-2015 @yopero
The Shapeoko is almost ready to be used:
-Firmware: GRBL v0.9
- GUI provided by BCNC
-List of Supported G-Codes in Grbl v0.9
 - Non-Modal Commands: G4, G10 L2, G10 L20, G28, G30, G28.1, G30.1, G53, G92, G92.1
 - Motion Modes: G0, G1, G2, G3, G38.1, G80
 - Feed Rate Modes: G93, G94
 - Unit Modes: G20, G21
 - Distance Modes: G90, G91
 - Plane Select Modes: G17, G18, G19
 - Tool Length Offset Modes: G43.1, G49
 - Coordinate System Modes: G54, G55, G56, G57, G58, G59
 - Program Flow: M0, M1, M2, M30*
 - Coolant Control: M7*, M8, M9
 - Spindle Control: M3, M4, M5
-Spindle variant speed enable
 - In order to make start the spindle use GCode M3 or M4 and provide an speed S eg M03S1000
 - Speed hard-coded limits from 0-1000 (can be changed on config.h)
 - If manual control is needed just connect the spindle it will automatically disable pwm on the board.
-Spindle Direction
- Spidle direction is enabled in firmware but we do not have hardware supporting it.
-Probing enable
- Probe must go to SCL pin and GND on the existing CNC shield
-Coolant Enable
 -M08	Coolant on (flood)
 -M09	Coolant off
-Zeroing out
-Use G92X0Y0Z0 it is the most reliable way of doing it.
-Unlocking at startup
 -GRBL needs to be unlocked before running any job. use $X for this.
  This info maybe needed once it is decided what gcode sender is to be used.
- Holding system
 -M8 insertion nuts installed on the waste board.
 -I have milled a couple of holding clamps.
 -Trainers can mill more whilst creating the training material.
-End Stops
 -Located at -x, +x, -y, +y, +z
 -probe at -z(not installed)
ToBeDone:
-Install an Emergency End Stop (NO switch)
-Shapeoko needs to be bolt down to the table.
-Find an smaller vacuum cleaner
-3D print a holder for the vacuum cleaner hose - to be attached to the Z axis.
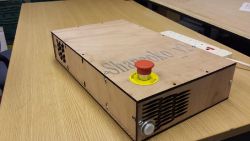
-Built case for electronics.
-Find trainers, create training material, train people.
Future Improvements:
 -Dust shoe
 -Install Probe to get perfect alignment with th surface to be milled.
 -Current spindle is too weak torque and speed wise.
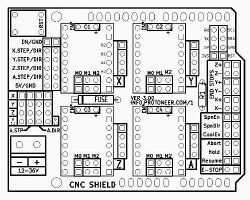
CNC Shield
- 29-Jan-2015
-Waste board fitted.
- 27-Jan-2015
...getting there.
ToDo:
-Enable spindle control pwm
"config.h"
line 155-157
// NOTE: IMPORTANT for Arduino Unos! When enabled, the Z-limit pin D11 and spindle enable pin D12 switch!
// The hardware PWM output on pin D11 is required for variable spindle output voltages.
// #define VARIABLE_SPINDLE // Default disabled. Uncomment to enable.
-Buy/get insertion nuts for the waste board.
-Fit waste board
-Buy/get threaded inserts for waste board (m8)http://www.ebay.co.uk/itm/M4-M5-M6-M8-M10-THREADED-TYPE-D-WOOD-INSERT-NUTS-ALL-SIZES-PACKS-OF-20-/321618140748?pt=UK_DIY_Material_Nails_Fixing_MJ&var=&hash=item4ae1ef5e4c
-Finish off securing the cables
-Fit emergency stop
-Calibrate and write the settings to the EEPROM directly
-Mill out clamps and other work-holding stuff
- 22-JAN-2015
-CNC shield setup to accept a 4 stepper driver which is a clone of the Y axis. See image.
-3 End stops(one for each axis all located at the positive end) fitted using custom 3d printed holders.
-We need to get more stepper drivers, Out of the five that were in the Ramps board only 3 are working.
-I have taken some jumpers(x4) from the Ramps board to setup the 4th stepper.
-Some cabling protection fitted(x axis and left y axis).
Todo:
-An endstop cable and one motor cabling needs to be longer.
-Find an Emergency stop switch.
-Install canbam or whatever software we what to use in the computer next to the Boxford.
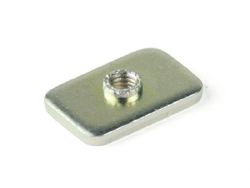
-We are missing a small bag full of insertion nuts that are needed to fit things to the frames, it was in the shapeoko box but is not there anymore. They look like the one shown on the right.
- 05-JAN-2015: Marlin RAMPS board is pants for this, buying a CNC Shield V3 to use it with grbl firmware and ChiliPeppr
- 24-NOV-2014: Plinth constructed, might be a bit too small
TODO
- Add more info to this wiki page
People
- Chris77uk
- yopero
- Mentar
- Tamlyn (not for a while)
- Esteban (not for a while)
- Matthew (not for a while)
Showing 1 related entity.
