|
|
| (27 intermediate revisions by 7 users not shown) |
| Line 1: |
Line 1: |
| | {{EquipmentInfobox | | {{EquipmentInfobox |
| − | | name = {{PAGENAME}} <!-- Do not change! Takes name from the name of the wiki page it is on. --> | + | |name=Stratasys 3D printer<!-- Do not change! Takes name from the name of the wiki page it is on. --> |
| − | | image = FDM 1650.JPG <!-- Image of the item. Leave with placeholder image if none exists. --> | + | |image=stratasys.jpg <!-- Image of the item. Leave with placeholder image if none exists. --> |
| − | | itemId = Unknown <!-- Item ID code if available -->
| + | |category=Equipment <!-- Main category. Please leave alone to keep item in this category --> |
| − | | category = Equipment <!-- Main category. Please leave alone to keep item in this category --> | + | |subcat=Defunct <!-- Sub-category if one exists. Please check main listing to see other categories contained within the main one --> |
| − | | subcat = CNC <!-- Sub-category if one exists. Please check main listing to see other categories contained within the main one --> | + | |status=Scrapped |
| − | | status = Under construction <!-- Set to one of; Good working order, Damaged, Out of order, Under construction, Out of consumables, Scrapped, or Unknown --> | + | |consumables=Printer filament <!-- Any items used up in normal operation, such as; ink, paper, saw-blades, cutting disks, oil, etc.. --> |
| − | | consumables = Printer filament <!-- Any items used up in normal operation, such as; ink, paper, saw-blades, cutting disks, oil, etc.. --> | + | |accessories=<!-- Any items associated with the equipment but not consumable, such as; drill bits, safety gloves, goggles, etc.. --> |
| − | | accessories = Unknown <!-- Any items associated with the equipment but not consumable, such as; drill bits, safety gloves, goggles, etc.. --> | + | |reqtraining=Yes <!-- Is training required to use this equipment? Yes or no. --> |
| − | | reqtraining = Yes <!-- Is training required to use this equipment? Yes or no. --> | + | |trainlink=[[#Training & instruction]]<!-- If training is required, provide a link to training signup or contact page. Otherwise leave blank. --> |
| − | | trainlink = [[#Training & instruction]]<!-- If training is required, provide a link to training signup or contact page. Otherwise leave blank. --> | + | |acnode=Yes |
| − | | acnode = Unknown <!-- Is the equipment ACnode locked? --> | + | |owner=LHS <!-- Provide a link to owners members page if other than LHS --> |
| − | | owner = LHS <!-- Provide a link to owners members page if other than LHS --> | + | |origin=Donation <!-- If via pledge, please link to the completed pledge page on the wiki --> |
| − | | origin = Donation <!-- If via pledge, please link to the completed pledge page on the wiki --> | + | |location=3D printer area, Ground floor <!-- Floor, room/zone and location within that area --> |
| − | | location = Basement, CNC area <!-- Floor, room/zone and location within that area --> | + | |maintainers=Hipster <!-- If an individual is nominated as managing the upkeep of this item, please list them here. --> |
| − | | maintainers = Hipster <!-- If an individual is nominated as managing the upkeep of this item, please list them here. --> | + | |itemId=<!-- Item ID code if available --> |
| − | | template_ver = 1.0 <!-- Please do not change. Used for tracking out-of-date templates --> | + | |template_ver=1.0 <!-- Please do not change. Used for tracking out-of-date templates --> |
| | }} | | }} |
| − |
| |
| | =Description= | | =Description= |
| | The Stratasys is a commercial-grade 3D printer that was [http://groups.google.com/group/london-hack-space/browse_thread/thread/a4088a8560511d67 donated to the LHS by Imperial College London]. It was repaired for a time, but is currently undergoing an extensive refurbishment to bring the electronics up to modern standards and properly convert it to non-vendor-specific feedstock. | | The Stratasys is a commercial-grade 3D printer that was [http://groups.google.com/group/london-hack-space/browse_thread/thread/a4088a8560511d67 donated to the LHS by Imperial College London]. It was repaired for a time, but is currently undergoing an extensive refurbishment to bring the electronics up to modern standards and properly convert it to non-vendor-specific feedstock. |
| − | =Specification & documentation=
| |
| − | As the Stratasys is undergoing extensive modification to it's control electronics, material use requirements and printheads, the factory specifications and original instructions for use are unlikely to remain accurate once refurbishment is complete. The previous specifications and instructions will likely be updated at that time.
| |
| | | | |
| − | Broadly, the only things likely to remain the same is the large 11x11x11inch printing volume, the dual-head extruder setup, controlled printing enclosure, and high-resolution industrial mechanics.
| |
| | | | |
| − | ==Original docs== | + | '''DISPOSAL: Notice of Disposal applied by Tgreer on 11/12/2016. Scrapped & gutted sometime over xmas period by Hipster.''' |
| | + | |
| | + | == Pictures == |
| | | | |
| − | UK reseller is http://www.laserlines.co.uk/. This one may have come direct from Stratasys, though.
| + | {| |
| | + | | [[File:FDM_1650.JPG|thumb|What it could look like, one day.]] |
| | + | | [[File:Stratasys_controls.jpg|thumb|The control panel for the Stratasys.]] |
| | + | | [[File:Stratasys_side.jpg|thumb|A side view of the Stratasys.]] |
| | + | |} |
| | | | |
| − | * [http://3d4u.org/MyFDM/ Extensive blog on the 1650 and 2000]
| + | =Specification & documentation= |
| − | ** Manuals for an FDM 2000 (includes description of Quickslice 5.0 - 1997):
| |
| − | *** [http://3d4u.org/MyFDM/wp-content/uploads/2010/12/2000APPL.pdf Applications]
| |
| − | *** [http://3d4u.org/MyFDM/wp-content/uploads/2010/12/2000UTIL.pdf Utilities]
| |
| − | *** [http://3d4u.org/MyFDM/wp-content/uploads/2010/12/2000INTR.pdf Manual]
| |
| − | *** [http://3d4u.org/MyFDM/wp-content/uploads/2010/12/2000PROC.pdf Procedures]
| |
| − | ** [http://3d4u.org/MyFDM/?p=29 Page referencing these] and C:\QuickSliceV64-qsni
| |
| − | ** [http://www.3d4u.org/MyFDM_Files/cb12abs-sml-101211.txt Calibration file]
| |
| − | ** [http://3d4u.org/MyFDM/?p=708 Webcams]
| |
| − | * [http://haveblue.org/ Another 1650 owner]
| |
| − | * [http://www.incredilution.com/2011/01/engineering-to-save-5000/ Repairing an FDM 2000]
| |
| | | | |
| − | * [http://support.knowlton.ohio-state.edu/files/InsightUserGuide.pdf Insight User guide] (2005) | + | *Usable Print Area: 270mm x 270mm x 300mm |
| | + | *Top Print Speed: 20mm/sec (Yes its slow) |
| | + | *Print Tolerance: 0.05mm in X and Y axes. Z axis is dependent on layer thickness |
| | + | *Layer Thickness: 0.05mm to 0.2mm |
| | + | *Supported Materials: ABS and PLA plastic filaments |
| | + | *Usable Filament Sizes: standard 1.75mm |
| | | | |
| − | * [http://replay.web.archive.org/19990221032334/http://www.stratasys.com/1600.HTM Stratasys product page] (1999)
| |
| − | * [http://www.hive76.org/fdm2000-progress Philadelphia hackspace] with an FDM 2000
| |
| | | | |
| | =Training & instruction= | | =Training & instruction= |
| − | [[File:2011-11-10 19.01.30.jpg|200px|thumb|left]]
| |
| | | | |
| − | [[File:2011-11-10_19.00.35.jpg|200px|thumb|right]] | + | Training '''IS REQUIRED''' and is being carried out voluntarily by the current maintainers, more info on the separate [[3dprinter_training|training page]] |
| | | | |
| − | '''<div style="color:red">Please don't touch or fiddle with the FDM 1650 unless you have been trained. </div>'''
| + | Please do not use the printer if you have not been trained, even if you think you know how to use it. |
| | | | |
| − | If you haven't used it before, please contact Chris Paton / Hipster and get him to show you how it works.
| + | ==Consumables== |
| − | | + | Only filament provided by the maintainers can be used in the Stratasys. This is to prevent any issues with poor quality filament. If we're running low on filament (or tape), ro recommended alternative providers, let them know (via the [[mailing list]]). |
| − | ==Software== | |
| − | | |
| − | Quickslice known versions are 5.0, [http://replay.web.archive.org/19990224223330/http://www.stratasys.com/PR061298.HTML 6.0], 6.1, 6.2, 6.4
| |
| − | Insight known version are 3.4.1, 4.2, 6.0, 7.0. Only 4.2 and below works with the 1650[http://jcflowers1.iweb.bsu.edu/rlo/fdm.htm].
| |
| − | | |
| − | Answers from Stratasys to emails:
| |
| − | | |
| − | <blockquote>
| |
| − | We stop supporting this system a couple years ago, so getting the software for this system is not possible because it cannot be purchased and is only available through a maintenance contract. We are not aware of any third party or open source application that would work on this system.
| |
| − | Quickslice might be archived somewhere, however, we have to adhere to company policy.</blockquote>
| |
| − | | |
| − | <blockquote>
| |
| − | Insight is Stratasys' program that lets you import stl files. There are minimal file manipulation tools, but it does let you reorient the model and scale it. An inputted stl file is then used to create a series of horizontal cross sections at a set Z interval. For modeling with ABS, this interval is 0.010".
| |
| − | | |
| − | | |
| − | Models are built out of a "build" or "model" material, but to support higher layers of this model material, a "support" material is typically laid down first. After creating support material, there toolpaths must be generated for the support and build extruding heads to follow as they create the part. These toolpaths are also called "roads."
| |
| − | | |
| − | | |
| − | For beginning modelers, Insight should be used to reorient the model (to decrease build time), to scale the model, to generate the slices (slc) and toolpaths (sml) files, and to give the operator information about the build time and material requirements. Fortunately, much of this can be done automatically.
| |
| − | </blockquote>
| |
| − | | |
| − | 6. In Insight, click "File," "Open," and browse to find your stl file to load; it is probably not on the default C:\ drive. If a dialog box reports that the part is oversized, ignore it; you can re-scale the part within Insight.
| |
| − | | |
| − | 7. On the right of the screen the "Modeler Setup" box will indicate the configuration. For typical operation with ABS plastic, this should indicate
| |
| − | | |
| − | '''FDM 1650 - 0.0100 slice height.'''
| |
| − | | |
| − | Model T12 tip ABS P400
| |
| − | Support T12 tip ABS P400R
| |
| − | | |
| − | '''Part fill style '''
| |
| − | :Perimeter/rasters
| |
| − | '''Part interior style '''
| |
| − | :Solid-fine
| |
| − | '''Support style '''
| |
| − | :Sparse
| |
| − | | |
| − | 10. Reorient your model so that the support material required and the and build time are minimized. There are some applications where part finish or other factors affect orientation decisions. To reorient the model, click "STL", "Rotate." Use the dialog boxes at the right to specify the rotation amount and direction. Repeat, as necessary. Even though your model might appear on the screen in the front, left of the build platform, you will be able to relocate it to any other suitable location after it is sent to the FDM, and the model should not be moved at this time, except to facilitate multiple model loading. (There is also an Automatic Orientation feature you may wish to use to, say, minimize supports.)
| |
| − | | |
| − | 11. Scale your model, if appropriate. FDM material is very expensive, and large models take a very long time to build. Select "STL," "Units and Scale." You may use the values in the pull down window beside "STL scale," or type in your own factor. You may not notice a change in your object, but the size of the surrounding box might seem to change. The build envelope is a 10" cube, and the box on the screen around your object represents this envelope. Note the "STL size" readout in the "STL Units and Scale" dialog box.
| |
| − | 12. Slice your virtual model by selecting the "Slice" icon.
| |
| − |
| |
| − | | |
| − | 13. Generate supports by selecting the "Support" icon
| |
| − | | |
| − | 14. Create toolpaths by selecting the "Toolpaths" icon.
| |
| − | | |
| − | 15. It's a good idea to then click "File, Save" to save your toolpaths file
| |
| − | | |
| − | 16. Back at the FDM, check to see if there is enough space on the foam build platform for your model. If there is not enough room, replace the foam.
| |
| − | | |
| − | If it is necessary to replace the foam:
| |
| − | | |
| − | A. Open the FDM front door. Watch where you put your hands; avoid getting burnt.
| |
| − | | |
| − | B. Flip the locking lever on the front, left of the build platform.
| |
| − | | |
| − | C. Pull the build platform forward, removing it from the FDM.
| |
| − | | |
| − | D. Close the FDM door.
| |
| − | | |
| − | E. Place the build platform on a table, and remove all 10 pins and the foam insert.
| |
| − | | |
| − | F. Remove any foreign materials from the build platform.
| |
| − | | |
| − | G. Flip the foam over, or if the underneath face was already used, select a new piece of foam. Note that the brown urethane foam is designed for ABS and the blue polystyrene foam is designed for investment casting wax (ICW).
| |
| − | | |
| − | H. Place the foam into the platform so it is seated firmly. This might require shearing part of the edge of the foam.
| |
| − | | |
| − | I. Invert the build platform so the foam is against a table.
| |
| − | | |
| − | J. Pressing down firmly on the platform, replace all 10 pins.
| |
| − | | |
| − | K. Blow off any debris, and replace the build platform in the FDM, securing the locking lever and closing the door.
| |
| | | | |
| − | 17. Check to see of the three temperature readings are sufficient.
| + | Filament options (3.0mm) |
| | + | *ABS (lego brick plastic - prints at 190-230 DegC, requires heated bed at 100-110 DegC) |
| | + | *PLA (biodegradable , based on food starch - prints at 185-190 DegC, optional heated bed, not hotter than 60 DegC) |
| | + | *There are other 'specialist' filament, like wood effect, stone effect, nylon (can be coloured by clothes dye), etc |
| | | | |
| − | 18. Check the Auto Shut Off status, and change it appropriately by depressing the Auto SO key on the FDM. If you will be the last to build a model for the day, turn Auto SO on; if another model will be built right after yours, leave it off.
| + | == 3D printing process == |
| − | | + | [[File:3D_Print_process.png ]] |
| − | 19. Extrude a bit of plastic from each head, to make sure there is no problem. To do this, toggle the Model/Support button until it the display reads Model. Then press the Load button once. In five to ten seconds you should see a strand exiting the model head. Press the Load button again to cancel the load. (Whatever you do, do not press the Unload button, as this backs the material out of the head.) Then press Model/Support to toggle to the support material and repeat. If plastic was extruded from both heads, then all you need do is brush off the plastic from the heads, and make sure the platform and rear brass brush are clear of debris. If one of the heads did not extrude plastic, or if there was an error message, please let the lab supervisor know.
| |
| − | | |
| − | 20. Notice the button on near the top, center of the FDM that says "Prgm 0" above it and "Pause" below it. Let's call this the Pause Button. If this button has a flashing amber light, press that button now to turn off the light. If the light is on, the FDM cannot receive information from the computer.
| |
| − | | |
| − | 21. Back in Insight, click the "Build" icon. In the "Pack and Download" dialog box, copy the following information to your notes:
| |
| − | | |
| − | * Estimated Model Material to be used:
| |
| − | * Estimated Support Material to be used
| |
| − | * Total time estimate:
| |
| − | | |
| − | Also, make a note of the present date and time and of the date and time when the job should finish. Click the icon to send the job to the modeler. (If you had wanted to send multiple copies to the FDM to be built simultaneously, you would have indicated so in this dialog box.)
| |
| − | | |
| − | 22. The Pause Button light should be flashing; press it to turn it off. This will cause the FDM to run through initialization routines, extruding support material and wiping the tips. When it is done, the light will come on again.
| |
| − | | |
| − | 23. Use the directional keys on the FDM to move the head in the XY plane, or the platform in the Z axis. Pressing the center key along with another key invokes a faster mode. There is also a toggle button so that the up/down keys can be control both the Y and Z axes. If necessary, lower the platform, open the door, and use the brass brush to gently clean the extruding tips. Be sure to also remove excess material from the inverted brush in the machine and from other areas in the machine and close the door. Reposition the left "build material" tip so that it is at the front, left of the rectangle where you wish the build to occur. Try to get the tip so it is barely touching the foam, neither embedded in it, nor above it.
| |
| − | | |
| − | 24. Press the Pause Button light.
| |
| − | | |
| − | 25. Note the time, the amount of material required, and estimate the approximate time of completion.
| |
| − | | |
| − | 26. Turn off the monitor. Since an active serial cable connection is required for the build to continue, other applications on that computer might interfere with the build. It is a good idea, therefore, to avoid using the computer for anything else during building.
| |
| − | | |
| − | 27. Return when the model is almost finished, or if its an overnight build, then return as soon as the lab opens in the morning. Put on your safety glasses again.
| |
| − | | |
| − | 28. Make sure your files are stored in the appropriate place for your class.
| |
| − | | |
| − | 29. When the model is done building, the head will go to the home position, the Pause Button light will flash, and the FDM display will show "100%". Open the door and gently remove your model. You might wish to remove the build platform to make this easier (especially for large models), but replace the platform when you are done. A fingernail may be used to remove the model from the foam. Close the door.
| |
| − | | |
| − | 30. Move any files created to the appropriate directory; do not merely copy them.
| |
| − | | |
| − | 31. If no other user is about to build a model, log off of the computer, and turn off the computer, the monitor, and the FDM. The fan in the FDM will probably still operate for a while.
| |
| − | | |
| − | 32. Carefully remove the support material from your model so you do not injure yourself or the model. Recommended tools for this are needle nose pliers, tweezers, and maybe a small screwdriver, and an X-Acto knife. If necessary, sand the model very lightly. Clean the FDM and, if necessary, finish your model. Be careful to avoid cutting yourself, to avoid breaking the model or a knife, and to protect your eyes from flying debris. Make sure others around you have eye protection. Please place all trash into the trash receptacle.
| |
| − | | |
| − | ==Hardware connection==
| |
| − | #Serial to parallel adapter from server
| |
| − | #parallel cable into back of FDM
| |
| − | #FDM power on (white button on front that says start)
| |
| − | #Server on
| |
| − | #Launch insight application
| |
| − | | |
| − | (It's probably not a parallel cable, just a 25pin RS232 port).
| |
| − | ===COM1 Settings===
| |
| − | | |
| − | Bits per second : 9600 <BR>
| |
| − | Data Bits : 7<BR>
| |
| − | Parity : None<BR>
| |
| − | Stop Bits : 1<BR>
| |
| − | Flow Control : Xon/Xoff<BR>
| |
| − | | |
| − | These settings are stored in a Hyperterminal session called FDM1650.
| |
| − | | |
| − | | |
| − | ==Usage notes==
| |
| − | | |
| − | *If we wanted to use the stratasys with skeinforge, we'd need to get skeinforge to output appropriate movement commands or, perhaps more maintainably, translate the G-code output into ACL. This might not be too difficult : skeinforge seems to use a very limited section of G and M codes, notably
| |
| − | | |
| − | G1 linear move
| |
| − | G2 cw arc
| |
| − | G3 ccw arc
| |
| − | G21 set units to mm
| |
| − | G28 home
| |
| − | G90 set absolute distance mode
| |
| − | G91 set incremental distance mode
| |
| − |
| |
| − | M101 extruder on
| |
| − | M103 extruder off
| |
| − | M104-108 extruder temperature control
| |
| − | M110 filament height ?
| |
| − | M113 duty cycle ?
| |
| − | | |
| − | *Write translator to perform the above conversion
| |
| − | | |
| − | ==Initial conditions== | |
| − | <pre>
| |
| − | Firmware Version is 9.01
| |
| − | | |
| − | OF: Calibration factors: 1.0027,1.0028
| |
| − | OI: AUTOMOVE REV 3.60/3.60
| |
| − | OL: travel limits: 0,0, 12000, 12000
| |
| − | ON: digital inputs state: 0
| |
| − | OO: origin : 0,0
| |
| − | | |
| − | OP: Personality parameters: (enter OP<space>n; or OP<space>nn;)
| |
| − | 1: Arrow Single Step Delay: 3000 (factory)
| |
| − | 2: Arrow slow step delay: 100 (factory)
| |
| − | 3: Arrow Fast Step Delay: 3 (factory)
| |
| − | 4: X Arrow Direction Swap: 0 (factory)
| |
| − | 5: 0
| |
| − | 6: 0
| |
| − | 7: 250
| |
| − | 8: 2
| |
| − | 9: 2
| |
| − | 10: 100
| |
| − | 11: 100
| |
| − | 12: 100
| |
| − | 13: 100
| |
| − | 14: 32767
| |
| − | 15: 32767
| |
| − | 16: 32767
| |
| − | 17: -15
| |
| − | 18: -15
| |
| − | 19: 1.0027
| |
| − | 20: 1.0028
| |
| − | 21: 8
| |
| − | 22: 8
| |
| − | 23: 0
| |
| − | 24: 0
| |
| − | 25: 12000
| |
| − | 26: 12000
| |
| − | 27: 16504
| |
| − | 28: 16504
| |
| − | 29: 1
| |
| − | 30: 0
| |
| − | 31: 1
| |
| − | 32: 40
| |
| − | 33: 10000
| |
| − | 34: 40
| |
| − | 35: 10000
| |
| − | 36: 0
| |
| − | 37: 0
| |
| − | 38: 255
| |
| − | 39: -1
| |
| − | 40: 200
| |
| − | 41: 25
| |
| − | 42: 1
| |
| − | 43: 0
| |
| − | 44: 100
| |
| − | 45: 32767
| |
| − | 46: 0
| |
| − | 47: 200
| |
| − | 48: 0
| |
| − | 49: 0
| |
| − | 50: -1
| |
| − | 51: 500
| |
| − | 52: 0
| |
| − | 53: 150
| |
| − | 54: 400
| |
| − | 55: 400
| |
| − | 56: 10
| |
| − | 57: 1
| |
| − | 58: 0
| |
| − | 59: 0
| |
| − | 60: 0
| |
| − | </pre>
| |
| − | | |
| − | | |
| − | ===Handling===
| |
| − | | |
| − | '''Any or all of these issues need investigating - but not haphazardly'''
| |
| − | | |
| − | *'''Document everything you do the same day'''
| |
| − | **Not just solid new information - add any progress, concerns, ideas, speculation etc.
| |
| − | *'''Do NOT leave the stratasys in bits'''
| |
| − | **If you must leave something incomplete, put all the parts in a bag attached to the machine, document it here and put a note on the machine if it should not be switched on or is otherwise restricted.
| |
| − | *'''Do NOT leave parts strewn around the adjacent table after you finish work
| |
| − | **Tidy up, refit all covers, use as little space as possible. It's only tolerable to keep the machine out of the awkward alcove if it doesn't take over a whole load of extra space.
| |
| − | *'''Do not assume you'll come back to finish something the next day etc. even if that's your plan - always leave the machine as though someone else will be working on it next.
| |
| − | | |
| − | ==Consumables==
| |
| − | If using any consumables, link here to recommended providers or current pledges to purchace.
| |
| | | | |
| | =Log= | | =Log= |
| | ==Original use== | | ==Original use== |
| | + | For pre-refurbishment logs, see the legacy sub-page here: [[Stratasys_FDM_1650/Legacy#Logs]] |
| | | | |
| − | ===Current Status - 4/11/11=== | + | ==Refurbishment== |
| | + | ===TODO=== |
| | | | |
| − | *[http://www.youtube.com/watch?v=wpUsUiTH8Fw Hipster got it working] after striping the extruder assembly and cleaning the whole block. | + | *1. <s>Remove all the unnecessary wiring, including the old heater tubes.</s> 16-05-2013 |
| | + | *2. <s>Identify the wiring on the steppers (these are wired differently to normal).</s> 16-05-2013 |
| | + | *3. <s>Connect the motors to the 4pi (http://wiki.arcol.hu/blog:4pi) and calibrate the settings.</s> |
| | + | *4. <s>Redesign the head end for 2 hot-ends and extruders.</s> |
| | + | *5. <s>Connected hot ends and run heat and thermistor checks. </s> |
| | + | *6. <s>Head end redesign complete, waiting for aluminium part for mounting hot-ends</s> |
| | + | *7. <s>Filament path checks.</s> |
| | + | *8. Install Raspberry Pi with Octoprint and touch-screen. |
| | + | *9. Dual head calibration test print. |
| | + | *10. Heated chamber (required for ABS), phase 2. |
| | | | |
| − | 01:20 < lovelace_> from hipster... I JUST GOT FDM TO DO ITS FIRST PRINT!!!!!!!!!!!!!!!!!!!!!!!!!!!!!!!!!!!!!!!!!!
| + | ==Updates== |
| | + | ===1-6-2014=== |
| | + | After providing spare hands to tgreer in trying to get the new controller wired in for the open-day, I noticed both motor connector plastics are extremely perished. Sockets and plugs. The Y-axis (?) stepper connector has previously been bodged. Pins no longer make good electrical contact with bodged SIL connector. This is both due to bent pins that have apparently been forced, but also the SIL socket terminals sliding freely in their plastics. Pins on stepper are also able to move into the motor body when pressed! Attempting to press another connector onto them will likely push them all the way into the motor housing, rendering the motor useless. |
| | + | As the motor pins still pass continuity tests, this severely damaged connection seems the likely reason for the motor skipping phases. |
| | + | My recomendation is that flying leads are soldered directly to the damaged pins and connected to a seperate connector that can be fixed to the chassis. Possibly a DB9. |
| | + | Replacing the steppers entirely is a possibility, but will be tricky due to the capstan-drive. Removing the stepper will probably mean re-winding and re-tensioning the system. |
| | | | |
| | + | The capstan drums seem at risk already however, as the (nylon?) coating on the steel cable is severely deteriorated, cracked and flaking off. Once the coating fails sufficiently to expose the cable, the cable will begin to eat into the surface of the aluminium capstan drums, ruining them. The drums are not likely to be easily replaced, the motors and cable are. |
| | | | |
| − | new wiki entry: | + | While the cable is fine for testing use, if the Statasys is going to be used frequently, new cable should be sourced as a priority. |
| − | [http://wiki.london.hackspace.org.uk/view/Equipment/FDM1650]
| |
| | | | |
| − | ===2/11/11===
| + | - Sci |
| | | | |
| − | *After Samthetechie took a look earlier this week, Hipster Chris managed to get the software running
| + | ===27-11-2013=== |
| − | *Set the port to COM1, sent a bathplug model, and tried to print
| + | The milled parts should arrive any day now and, once installed, we should be ready for a first test print. |
| − | *Needs some config to set the limits
| |
| − | *Still needs the powering-off bug to be fixed.
| |
| | | | |
| − | ===27/10/11===
| + | As far as I am concerned, based on the investment by members, a successful print of any description, using both extruders or not, is proof of working. Having experimented with Dual Extruders, the configuration too complicated to include this by the (self imposed) deadline. |
| | | | |
| − | *Attempted to run windows software. but windows refuses to run as it isn't licensed.
| + | Thanks |
| − | *Taken CD home in the hope I can install it elsewhere
| + | Ian |
| | | | |
| − | ===17/10/11===
| |
| | | | |
| − | *Moved out of alcove and tried a few basic things.
| |
| − | *Self-test ran (aborted) after restoring front panel connector.
| |
| − | *All axes capable of movement using arrow pad.
| |
| − | *Remaining parameters dumped and entered in wiki
| |
| − | *Feed Home command works
| |
| − | *Z home using buttons appears not to stop (aborted, looked dangerous)
| |
| − | *ACL manual reports that microstepping is used (but is that for a different controller ?)
| |
| | | | |
| − | ===6/10/11===
| |
| | | | |
| − | (Billy posted this to the mailing list)
| + | ===01-11-2013=== |
| | + | Currently the Stratasys is moving and the hot-ends/extruders are working. We are waiting for the aluminium to mount the hot-ends in. |
| | | | |
| − | Ally, one of Dean's friends, has said that she's happy to help us
| + | Once this is completed, it shouldn't take much longer to have this completed and working. |
| − | repair it. She's worked on older versions of the Stratasys printers,
| |
| − | and she's already had a look at the electronics. She's happy to to
| |
| − | show people what needs doing, and how to do it, though she'll need her
| |
| − | expenses covering for travel. I think it's inside the M25.
| |
| | | | |
| − | I'll pass along the contact details. | + | However, as I mentioned on IRC, if we cannot have a completed print by Christmas, I think this project should be marked as 'not completable' (if there is such as word) and we call it a day... |
| | | | |
| − | As for the state of the Stratasys. The transport mechanisms work fine.
| + | Thanks |
| − | Both extruders seem to work. The temperature control mechanisms seem
| + | Ian |
| − | to work, though the machine has the tendency to run for a while, then
| |
| − | shut down instantly.
| |
| − | | |
| − | From what Ally said, this is usually due to either leaking capacitors,
| |
| − | or two-legged transistors. Usually simple enough to replace, but this
| |
| − | project went waaaaaaaay past my skill levels in electronics a long
| |
| − | time ago... :))
| |
| − | | |
| − | The server sitting next to the Stratasys is set up with the OS and
| |
| − | software needed. We can communicate with the control boards happily.
| |
| − | | |
| − | ===2011-07-01===
| |
| − | | |
| − | The rackmount machine on the floor is now running XP again; somebody, likely Billy, reinstalled the system without updating this page.
| |
| − | | |
| − | I've installed speedfan, and disconnected some of the non-software-controllable fans. This makes it somewhat less horribly loud.
| |
| − | | |
| − | I've also started documenting the initial parameters below.
| |
| − | | |
| − | The correct serial settings are 9600 7E1 (that is, even parity, 7 data bits, 1 stop bit). Other settings work, but ESC.E gives errors.
| |
| − | | |
| − | ===2011-06-23===
| |
| − | | |
| − | The rackmount machine on the floor under the terminal to the right of the stratasys is named capak (the man who coined the term "robot"). The user is hackspace/hackspace. Please use sudo for root. (The root password is also hackspace.)
| |
| − | | |
| − | If you know why the monitor is nigh-unreadable, please fix it.
| |
| − | | |
| − | It should be possible to ssh to it from within the space. (Use capak.local.)
| |
| − | | |
| − | ===10/06/11===
| |
| − | | |
| − | It's kind of functional.
| |
| − | | |
| − | There's an computer connected to it and we can get a serial port connection on COM1.
| |
| − | | |
| − | At the moment it's only returning error messages.
| |
| − | | |
| − | The automated tools can connect happily.
| |
| − | | |
| − | IT STILL NEEDS CALIBRATION BEFORE USE!!!
| |
| − | | |
| − | Please do this first, and let us know what happened.
| |
| − | | |
| − | There are two printed manuals, a printed service manual, and the rest of the docs are on the desktop in the Stratasys folder.
| |
| − | | |
| − | I'm in the middle of setting up the software. It's NOT usable yet!
| |
| − | | |
| − | I'll be back later tonight to finish setting it up...
| |
| − | | |
| − | ===DONE===
| |
| − | | |
| − | * Power up normally. Are there any bad-looking lights on the front panel? If so, something is stuck.
| |
| − | DONE! - It's fine.
| |
| − | | |
| − | * Power up with left and right buttons pressed, should start self-test run. It will loop, power-off or hit reset to stop it.
| |
| − | DONE! - It works as expected. Ran through all the self-tests, and they came out ok.
| |
| − | They're all in the service manual. Have a look.
| |
| − | | |
| − | * Connect the serial port up. Document how to reach it on this wiki page.
| |
| − | * Open her up, document the position of the switches on the back of the automove unit.
| |
| − | * Determine serial parameters from the dip switches, see page 9 of [http://www-car.asymtek.com/support/manuals/70_0045_20_C.pdf the automove operation manual].
| |
| − | DONE! [[Equipment:Stratasys_FDM_1650#COM1_Settings]]
| |
| − | | |
| − | * Using [http://www.nordson.com/en-us/divisions/asymtek/documents/manuals/76_cs02_01_acl_manual.pdf the acl docs], find the current values of the personality parameters, document them here. This will hopefully keep us from losing them by accident later, and tell us a bit about how the machine is set up. You'll want the OP command, page 3-50, and the list of personality parameters, page 14-1.
| |
| − | DONE! [[Equipment:Stratasys_FDM_1650#Initial_Conditions]]
| |
| − | ==Refurbishment==
| |
| − | ===TODO===
| |
| − | | |
| − | *1. <s>Remove all the unnecessary wiring, including the old heater tubes.</s> 16-05-2013
| |
| − | *2. <s>Identify the wiring on the steppers (these are wired differently to normal).</s> 16-05-2013
| |
| − | *3. Connect the motors to the 4pi (http://wiki.arcol.hu/blog:4pi) and calibrate the settings.
| |
| − | *4. Redesign the head end for 2 hot-ends and extruders.
| |
| − | *5. Connected hot ends and run heat and thermistor checks.
| |
| − | *6. Filament path checks.
| |
| − | *7. Install Raspberry Pi with Octoprint.
| |
| − | *8. Calibration test print.
| |
| − | *9. Heated bed design (required for ABS), phase 2.
| |
| | | | |
| | ===16-05-2013=== | | ===16-05-2013=== |
| Line 446: |
Line 133: |
| | Hipster | | Hipster |
| | </code> | | </code> |
| | + | |
| | | | |
| | =Links= | | =Links= |
| Stratasys 3D printer |
|---|
 |
| Sub-category |
Defunct |
|---|
| Status |
Scrapped |
|---|
| Consumables |
Printer filament |
|---|
| Training requirement |
Yes |
|---|
| Training link |
#Training & instruction |
|---|
| ACnode |
Yes |
|---|
| Owner |
LHS |
|---|
| Origin |
Donation |
|---|
| Location |
3D printer area, Ground floor |
|---|
| Maintainers |
Hipster |
|---|
Description
The Stratasys is a commercial-grade 3D printer that was donated to the LHS by Imperial College London. It was repaired for a time, but is currently undergoing an extensive refurbishment to bring the electronics up to modern standards and properly convert it to non-vendor-specific feedstock.
DISPOSAL: Notice of Disposal applied by Tgreer on 11/12/2016. Scrapped & gutted sometime over xmas period by Hipster.
Pictures
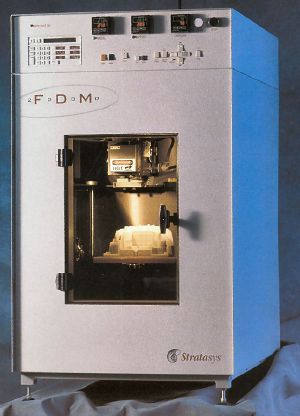 What it could look like, one day. |
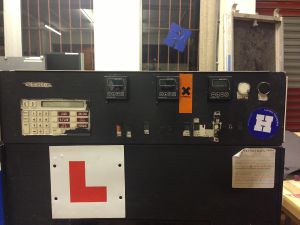 The control panel for the Stratasys. |
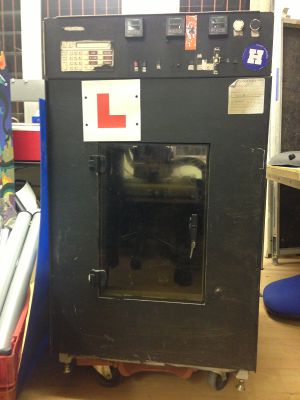
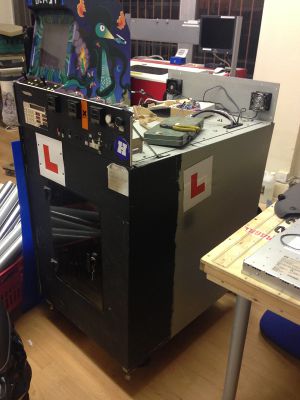 A side view of the Stratasys. |
Specification & documentation
- Usable Print Area: 270mm x 270mm x 300mm
- Top Print Speed: 20mm/sec (Yes its slow)
- Print Tolerance: 0.05mm in X and Y axes. Z axis is dependent on layer thickness
- Layer Thickness: 0.05mm to 0.2mm
- Supported Materials: ABS and PLA plastic filaments
- Usable Filament Sizes: standard 1.75mm
Training & instruction
Training IS REQUIRED and is being carried out voluntarily by the current maintainers, more info on the separate training page
Please do not use the printer if you have not been trained, even if you think you know how to use it.
Consumables
Only filament provided by the maintainers can be used in the Stratasys. This is to prevent any issues with poor quality filament. If we're running low on filament (or tape), ro recommended alternative providers, let them know (via the mailing list).
Filament options (3.0mm)
- ABS (lego brick plastic - prints at 190-230 DegC, requires heated bed at 100-110 DegC)
- PLA (biodegradable , based on food starch - prints at 185-190 DegC, optional heated bed, not hotter than 60 DegC)
- There are other 'specialist' filament, like wood effect, stone effect, nylon (can be coloured by clothes dye), etc
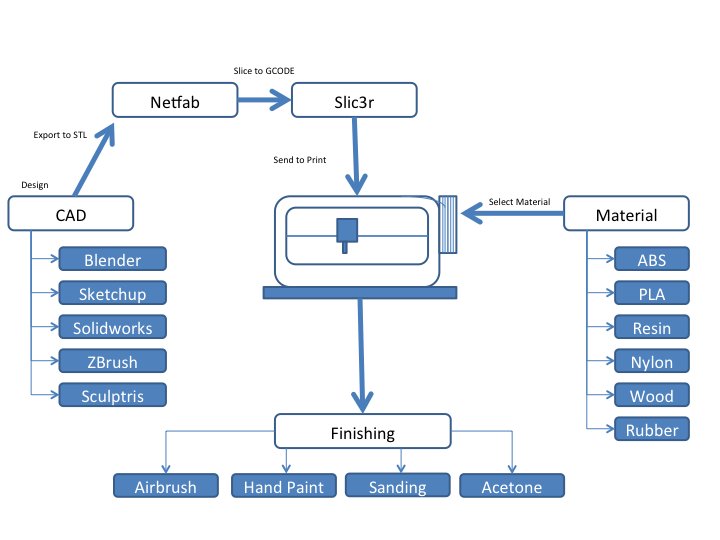
3D printing process
Log
Original use
For pre-refurbishment logs, see the legacy sub-page here: Stratasys_FDM_1650/Legacy#Logs
Refurbishment
TODO
- 1.
Remove all the unnecessary wiring, including the old heater tubes. 16-05-2013
- 2.
Identify the wiring on the steppers (these are wired differently to normal). 16-05-2013
- 3.
Connect the motors to the 4pi (http://wiki.arcol.hu/blog:4pi) and calibrate the settings.
- 4.
Redesign the head end for 2 hot-ends and extruders.
- 5.
Connected hot ends and run heat and thermistor checks.
- 6.
Head end redesign complete, waiting for aluminium part for mounting hot-ends
- 7.
Filament path checks.
- 8. Install Raspberry Pi with Octoprint and touch-screen.
- 9. Dual head calibration test print.
- 10. Heated chamber (required for ABS), phase 2.
Updates
1-6-2014
After providing spare hands to tgreer in trying to get the new controller wired in for the open-day, I noticed both motor connector plastics are extremely perished. Sockets and plugs. The Y-axis (?) stepper connector has previously been bodged. Pins no longer make good electrical contact with bodged SIL connector. This is both due to bent pins that have apparently been forced, but also the SIL socket terminals sliding freely in their plastics. Pins on stepper are also able to move into the motor body when pressed! Attempting to press another connector onto them will likely push them all the way into the motor housing, rendering the motor useless.
As the motor pins still pass continuity tests, this severely damaged connection seems the likely reason for the motor skipping phases.
My recomendation is that flying leads are soldered directly to the damaged pins and connected to a seperate connector that can be fixed to the chassis. Possibly a DB9.
Replacing the steppers entirely is a possibility, but will be tricky due to the capstan-drive. Removing the stepper will probably mean re-winding and re-tensioning the system.
The capstan drums seem at risk already however, as the (nylon?) coating on the steel cable is severely deteriorated, cracked and flaking off. Once the coating fails sufficiently to expose the cable, the cable will begin to eat into the surface of the aluminium capstan drums, ruining them. The drums are not likely to be easily replaced, the motors and cable are.
While the cable is fine for testing use, if the Statasys is going to be used frequently, new cable should be sourced as a priority.
- Sci
27-11-2013
The milled parts should arrive any day now and, once installed, we should be ready for a first test print.
As far as I am concerned, based on the investment by members, a successful print of any description, using both extruders or not, is proof of working. Having experimented with Dual Extruders, the configuration too complicated to include this by the (self imposed) deadline.
Thanks
Ian
01-11-2013
Currently the Stratasys is moving and the hot-ends/extruders are working. We are waiting for the aluminium to mount the hot-ends in.
Once this is completed, it shouldn't take much longer to have this completed and working.
However, as I mentioned on IRC, if we cannot have a completed print by Christmas, I think this project should be marked as 'not completable' (if there is such as word) and we call it a day...
Thanks
Ian
16-05-2013
To the mailing list:
Hey all.
Right, finally got time today to do a thorough check-up on the stratasys. As I have rpreviously said, all internal mechanics (including the steppers) are in full working order, especially as I performed a strip and clean to it pre-move.
After a quick talk with Ian on Wednesday, I have traced all the cables and found all the documentation for the parts, ferrous detecting end-stops, x-y controller pin outs, steppers etc. I have removed the old and power hungry heaters and flourescent lights.
I have paird the stepper cables and made ready for the 4-wire board. Also gave another clean
Basically it is ready to be connected to control board and ready to run.
All we need now are to nice tourqey nema17 steppers, 2 j-hotends (ian has offered to source and will start pledge, less than £100). Once these have turned up and I've cad modeled them, i will design a nice clean and easily accesable mount for them in the existing hot end housing (also been cleaned).
Charles will need to add a ACNode and it'll be up and running as a tool for the space. But like the laser cutter and charles, I will be its main care-taker/daddy lol.
Hope this has cleared up any concerns or apprensions about having a fully working, accurate, industrial 3D printer in the space to be used by people with training.
Regards
Hipster
Links
Training
Modification
Reverse engineering


