Difference between revisions of "NAS device"
| Line 76: | Line 76: | ||
---- | ---- | ||
| − | [[ | + | [[Hacking the Nexenta boot disk]] 'syspool' |
---- | ---- | ||
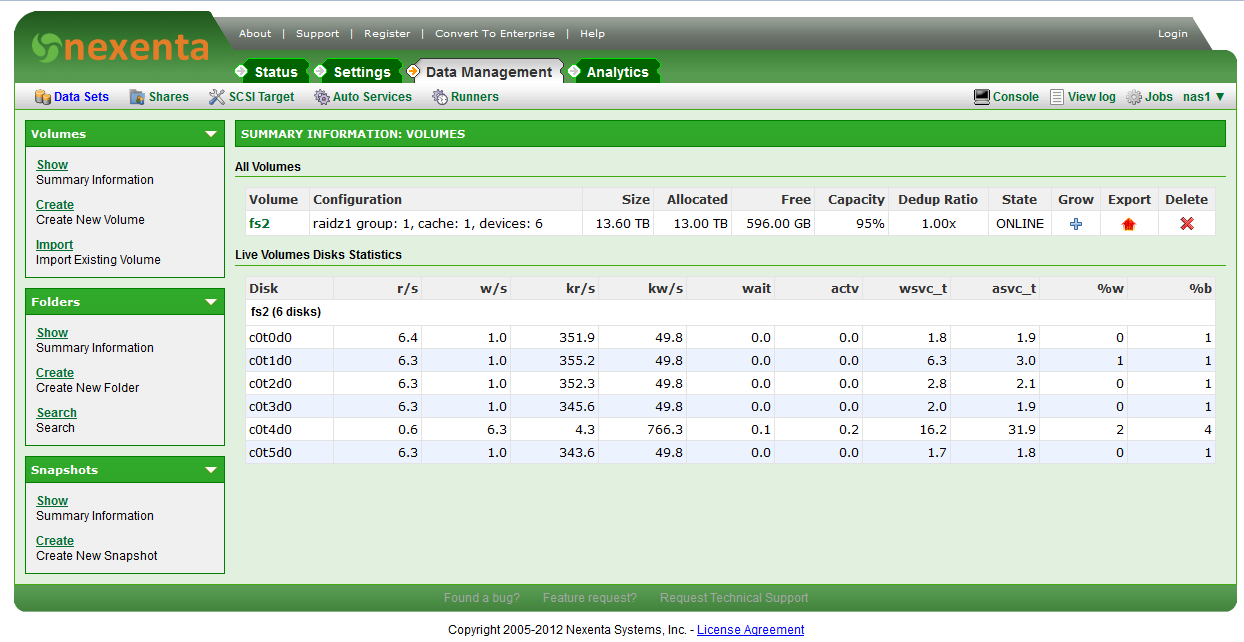
[[File:Nas1_-_data_management_-_data_sets.PNG]] | [[File:Nas1_-_data_management_-_data_sets.PNG]] | ||
Latest revision as of 23:05, 18 January 2014
The HP Microservers offer a flexible approach to a DIY NAS solution. The hardware has
- dual core AMD processor
- 2 * DIMM slots t
- 1 GByte ethernet
- 4 * 3.5" SATA drive bays
- 1 * 5.25" drive bay intended for optical drive.
There are 3 models (that I know of) of the microserver - the older N36L a more recent (as of Feb 2012) N40L and the latest (as of mid 2013) the N54L.
The servers have a very attractive price of £220 (+VAT) and there have been regular offers where there is a £100 cashback - so the price comes in at less than £150 for the base machine.
For a NAS device there is little requirement for an optical drive so it would seem reasonable to put a 5th hard disk into the top bay - one of these looks attractive to mount a 3.5" disk in the 5.25" bay : http://www.amazon.co.uk/gp/product/B000KS8S9W/ref=oh_o01_s01_i00_details or this one http://www.amazon.co.uk/gp/product/B004LOANNK/ref=wms_ohs_product?ie=UTF8&psc=1 has a 2.5" bay as well which could be used for a SSD.
However, the BIOS as delivered is configured to not allow the 5th SATA port to run at 3.0G and there are reports of performance issues when mixing
There is plenty of information on hacking the BIOS for the N36L and the N40L and I have followed this to build a NAS box from the N40L.
I am now planning to build another pair of NAS devices from the N54L and hopefully the instructions for hacking the BIOS of the N40L will work for this one as well.
The pair of NAS's I have based on the N40L comprises:
- N40L
- with hacked BIOS - it seems that the BIOS is an off the shelf AMI BIOS that HP use but they have locked it down and the 'hack' is merely to unlock it
- 2 * 4G DIMMs which is the max memory configuration according to the documentation form HP but there are reports that some people have had luck with 2 * 8G DIMMs with some specific brands of memory. I haven't tried this but if I wasn't about to build a new NAS's then I would explore upgrading the RAM because the software I am using makes use of all spare RAM for caching.
- dual dock http://www.amazon.co.uk/gp/product/B004LOANNK/ref=wms_ohs_product?ie=UTF8&psc=1
- 5 * 3TByte disks - 4 mounted in the internal disk bays and one in the dual dock
- 120 GByte SSD - Samsung 840 PRO in one machine and Intel 330 Series in the other
- a short (30cm) SATA cable to connect the 3.5" bay to the motherboard
- a short (30cm) eSATA to SATA cable to connect the SSD in the 2.5" bay to the eSATA port on the back - I had to cut a hole in one of the blanking plates of one of the PCIe slots.
- SANDISK Extreme USB key 16G for OS - http://www.amazon.co.uk/gp/product/B007YXA5S8/ref=wms_ohs_product?ie=UTF8&psc=1 - these were the fastest USB memory sticks I could find and have wear levelling.
- I found that the performance of the web GUI was quite dependent on where it was installed but since I wanted to use all the disk bays for data disks I had to use the USB boot option for the OS.
- NexentaStor NAS software - this is based on a fork of OpenSolaris with a Web GUI. There are 2 versions available, the enterprise edition is quite pricey but the community edition is free for upto 18TByte of configured storage. The 5*3T disks give just short of 11T of usable storage.
Hacking the BIOS
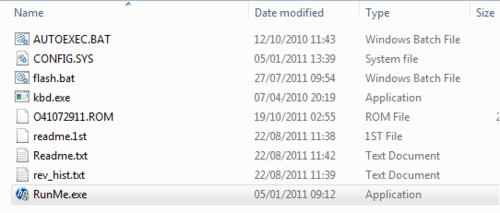
- Follow this link http://www.avforums.com/threads/hp-n36l-n40l-n54l-microserver-updated-ahci-bios-support.1521657/ and download the TheBay_Microserver_Bios_041.rar file
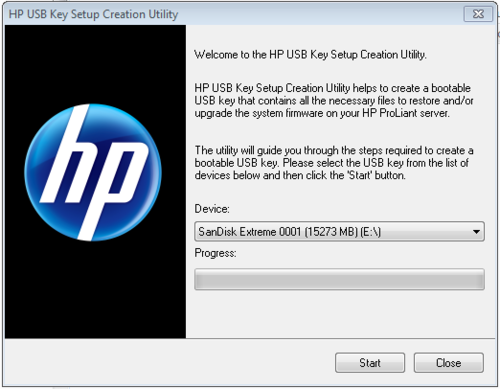
- double click 'RunMe.exe' and follow the instructions on screen, select a USB memory stick to write to:
- Then insert the USB memory stick into a USB port on the MicroServer and boot from USB, it flashes the BIOS and waits for a reboot:
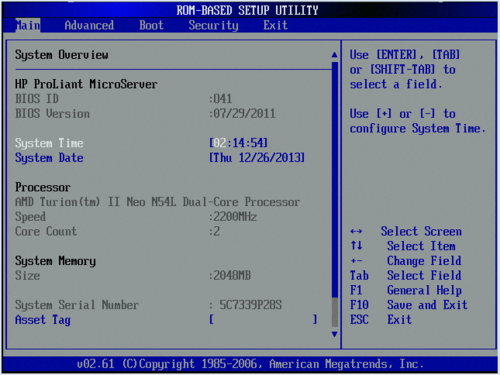
Now, let's take a look at what has changed. Boot, hit F10 to go into BIOS settings. Before we flashed the BIOS we would have had something like:
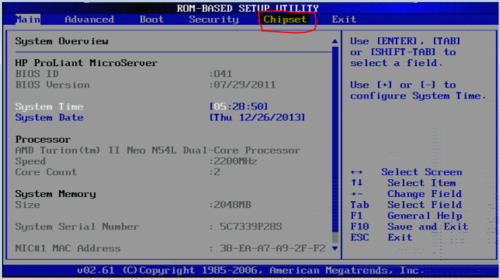
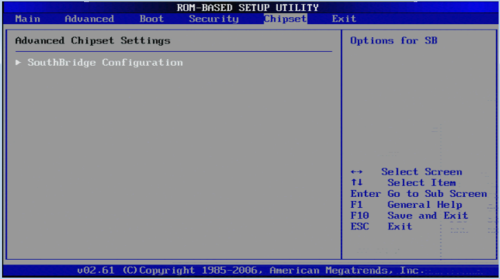
and after flashing the BIOS we have:
Note the extra top-level menu option 'Chipset' - it is under here that we can now modify the settings for SATA ports 4 and 5.
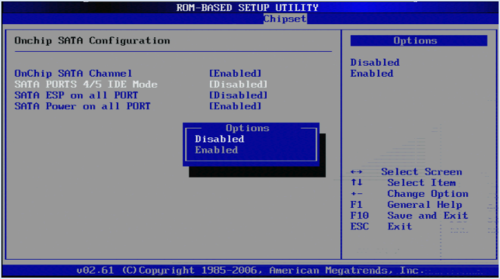
and we want to disable IDE mode for ports 4/5:
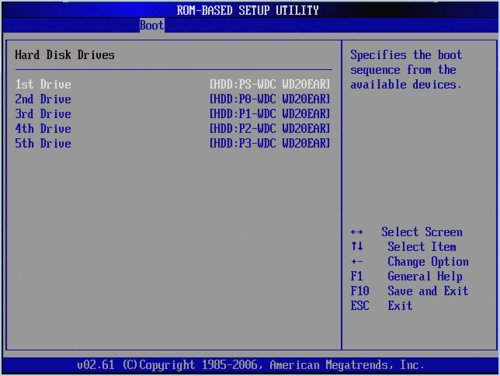
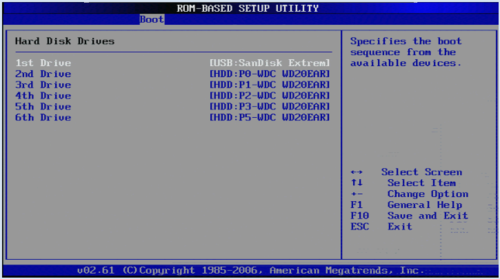
Now, when we look at the Boot->Hard Disk Drives menu settings we see that all of the number sequentially whereas beforehand one of them was 'HDD:PS' - not sure what the nomenclature means butwe want the modified setting
Installing Nexentastor NAS software
Configuring Nexenta
Hacking the Nexenta boot disk 'syspool'
