Equipment/HP1661C
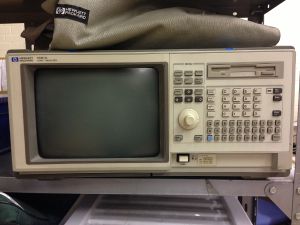
HP1661C Logic Analyser
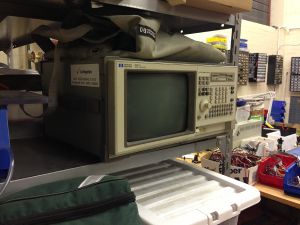
Currently on the metal shelves next to the electronics area.
A newer nicer unit than the older logic analyser, and more complete (it has more probes). Currently untested - anyone got something digital they want reverse engineered?
It has 102 state and timing channels, has PS2 ports for a standard PC mouse and keyboard and has a internal hard disk. It has a sticker indicating it was last calibrated in 2002.
This unit is fitted with the Ethernet option (Option 15) which allows FTP access and remote control via an X11 front-end using an Xserver.
There is an extensive User Guide for it here
Some pictures here:
http://www.flickr.com/photos/hllns/8446121470/in/photostream/
Contents of Kit
The whole kit contains (and should still have by the end of your using it):
- 6 Pod cables (fabric)
- 2 High density probe adapters
- 4 sets of Pod probe cables (Labeled Pod 2, Pod 3, Pod 5, and Pod 6)
- Plenty of clamps
- PS2 mouse
- PS2 keyboard
- Case of floppy disks (OS disks 1 and 2, Performance measuring tool, and symbol utilities)
Guides and Manuals
[LAN User Guide] - Includes how to mount and control the analyser over X11 and NFS/FTP, also shows how to export data in ASCII and aquire screenshots.
[Programming Guide] - Includes how to write programs in BASIC and other languages that can run on the HP1661c
[User Guide] - Instructions on basic setup and usage. Includes an extensive section on what triggers are and how to use them.
How to analyze logic
This is a fairly scary bit of kit at first, but it is fairly easy to set up for basic logic analyzing.
- Unpack and plug Pod 1 (Or a pod of your choice) into a set of probes.
- Attach the ground probe to ground, and probes 0 through 15 to the things you'd like to probe
- Turn it on (Big power button at the bottom)
- Press the "Config" button
- Make sure the Pod you're using is assigned to the Analyzer you want to use (A1 is Pod 1, A2 is Pod 2...). You will see the current state of the pins on this page, this is useful for working out which pin is which.
- Set Analyzer 1's type to Timing. This means that it'll use it's own clock rather than relying on a clock signal
- Press "Format" and use the cursor keys to scross down to the labels. Labels are groups of pins and allow for easier sorting later on. You should see Lab1 through Lab8, configure Lab1 and scroll along, setting the pins you want to monitor to *, the nearest large box is the clock line for each Pod (Pods are grouped in pairs), the next two are the second Pod probes, and the first Pod probes.
- Press Trigger. Here you can set up triggers to enable or disable analyzing, this is useful if you want to only analyze certain parts of code. The syntax can be found in the user guide above.
- Press Wave-form. You should see Lab1 on the side, scroll down to it and press select twice, then Delete all.
- Press select again and from the menu insert the pins that you want to display.
- Congrats, you're ready to run. Either move the cursors to the Run in the top right or press the run button on the front, this will analyze one cycle. To get it to keep analyzing press shift (blue button) then Run.

