Environmental Chamber: Difference between revisions
(location, confirmed as working.) |
(→Status) |
||
| Line 20: | Line 20: | ||
Situated | Situated in 'Murder kitchen' next to pcb manufacture (not ideal!). | ||
The chamber is currently 'on trial' as hackspace equipment : it takes up a moderate amount of space and may not prove to be useful. If this is the case, I will move it on, perhaps to another user. So please don't leave it in pieces or make permanent changes without talking to me first. --[[User:Artag|Artag]] 16:14, 30 March 2011 (UTC) | The chamber is currently 'on trial' as hackspace equipment : it takes up a moderate amount of space and may not prove to be useful. If this is the case, I will move it on, perhaps to another user. So please don't leave it in pieces or make permanent changes without talking to me first. --[[User:Artag|Artag]] 16:14, 30 March 2011 (UTC) | ||
Latest revision as of 16:57, 30 July 2019
Status
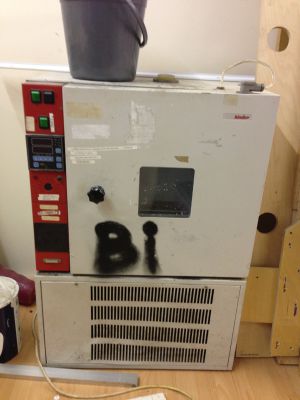
Situated in 'Murder kitchen' next to pcb manufacture (not ideal!).
The chamber is currently 'on trial' as hackspace equipment : it takes up a moderate amount of space and may not prove to be useful. If this is the case, I will move it on, perhaps to another user. So please don't leave it in pieces or make permanent changes without talking to me first. --Artag 16:14, 30 March 2011 (UTC)
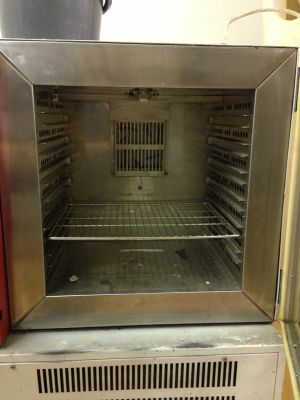
There is an old square baking tray kicking around that could be used for anything that might melt, drip or otherwise mess up the inside of the chamber. I left it inside the chamber but it could end up anywhere in the space. As of november 2011 I havn't seen it for a while.
Uses
I've mainly brought this in for possible use in biohacking - it will cool, heat, hold a temperature, follow a simple profile and might be hacked to allow further control. However, there are other possibilities :
- Beer cooler (has been used for this)
- Pie warmer (and listeria farm .. see biohacking)
- Sous vide roaster (and listeria farm .. see biohacking)
- Vacuum forming oven (this is what I originally intended it for)
- Glue drying / thermosetting (the most recent commercial use)
- Electronics testing / fault diagnosis (common industrial use)
- Low-temperature firing for polymer clay or similar
- Heated build cabinet for cupcake
Temperature range is <unknown, maybe -10> to +200 C
Controls
I'm going to have to try it again to give proper details and never really got a good idea of the temperature controller, but the important parts are :
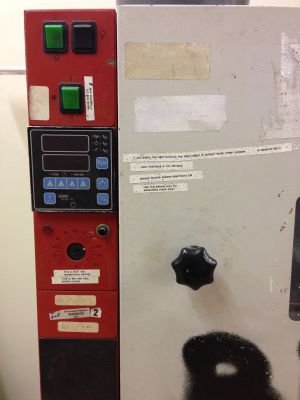
- Switches at top - mains, internal lamp, fridge unit
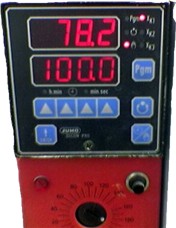
- Temperature controller - set temperature demand and show temperature.
- Temperature dial - does NOT set temperature, It sets the over-temperature trip level at which it will automatically cut out. Set it just above the maximum you will require.
- D-type connector- Don't know. Possibly RS232 to controller.
Heating operation is straightforward. Just set a temperature higher than ambient and don't switch the fridge on.
Cooling operation is less obvious - I think the cooler itself runs to a very coarse setting and the heater is used for fine control. In particular, I think you have to set an auxiliary control output on the temperature controller to enable the cooler. I have had this working so it's not impossible but may require a bit of fiddling.
I had a go at using the environmental chamber to make sure some welding rods were free of moisture. The user interface is still a mystery to me but I pressed buttons until the top red numbers showed current temperature, the lower red numbers showed "100.0" (desired temperature) and the XK1 and "hand" red LEDS were illuminated. I left the green switch with a snowflake symbol off. The temperature shot up to 50degC quite rapidly then took a couple of minutes to get to 100degC. The XK1 led flashed when it was at 99.9degC. --AJP
Rough Instructions
Simple temperature-setting instruction:
Press and hold (3s ish) 'hand' button until the display shows 'SETP'.
Set required temperature using up and down arrow buttons.
Press and hold (1s) 'enter' button, twice. --PaddyD
Below is a manual for the controller in the oven. Please note that it is generic: it does not refer to this particular implementation... :)
Media:b70.6040gb_DICON_PRS_09.90.pdf --PaddyD
All buttons need to be pressed and held for some time:
Press the program (PGM) button. Alter the program with the up arrows (it over flows) and press enter to change the part of the program your are altering.
Press the circular bidirectional arrow and dot button. This starts a program (sometimes....). Select the delay before the start of the program and some other options. Press enter to cycle through these options.
Careful
- Don't leave it on unnecessarily, wasting electricity
- If you have to move it, try not to drag it. The feet will fall off. Check when you've finished that they're all still fitted.
- Don't lose the trays that are inside, especially the fitted one it came with.


