Equipment/Knitting Machine
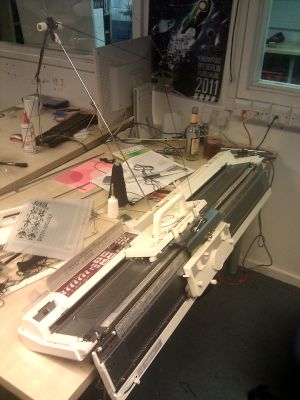
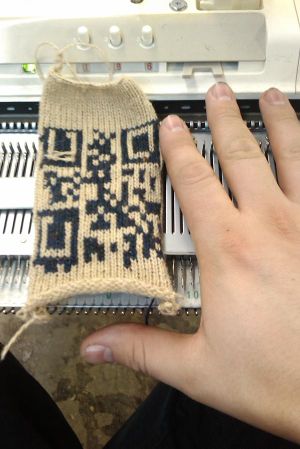
We have a Brother KH-950 knitting machine with a pile of attachments which we bought through a pledge in July 2011. This is a computerised knitting machine with the capability of "printing" in two colours from user-supplied patterns (currently through punch-cards and paper, although ideally from USB).
The Bits
Our knitting kit consists of:
- Brother KH-950 Knitting Machine
- Brother KR-850 Ribber
- Brother (?) Colour Changer
- Brother KL-116 Knit-Leader
How to use it
The knitter is a surprisingly complex device - talk to someone who knows how to use it before using it (try User:Chixor first, but Solexious, Russ, and Tom Wyatt have also used it). Being shown how to set it up and use it will save you at least an hour and will reduce the chance that you'll break it.
Dispense with your hubris, and read the manual. You might think you're able to use any device without a manual, but this will prove you wrong and leave you looking like a fool. The manual is mostly good (if rather terse and formatted in a fetching, patronisingly sexist shade of pink), but you have to follow it well and take it slowly. And sometimes it glosses over the important bits.
Where it Lives
In the Hackney space you can find the knitting machine and its accessories/attachments on the ground floor in the back corner of the craft area where the shelves line the wall.
Please keep the knitting equipment in the correct boxes, or everyone will get confused. The parts live in 5 different boxes:
- The KH-950 knitting machine, in its proper white case with a handle. This contains everything you need to use the knitter itself. When you open the box, observe carefully where everything is, because it's a bugger to put back together. (Instructions on how to pack the knitting machine up are in the manual.)
- The ribber, its accessories (plus a couple of large spares for the knitting machine), in a cardboard box. (Some of these accessories might be useful for using the knitter alone but they are not essential for it.)
- A plastic box with the yarn, elastic, and misc additional knitter accessories.
- The "Knit-Leader" and its tube of supplies, loose.
- The Waitrose bag of knitting books, which includes the manuals for all the devices.
Yarns
The KH-950i is a standard gauge domestic 4.5mm (industrial 5.6 gauge). This means it will knit:
- 2 ply
- 3 ply (fingering weight)
- 4 ply (sock/sweater weight)
- some double knitting / sport weight yarns
If you're new to the realm of machine knitting it's best to use a 3 or 4 ply yarn that's smooth and consistent all the way along (no thickness variation or fancy bits). The reason for this is if you haven't setup the yarn feeder or tension dial perfectly on either the main bed or ribbing bed then you'll run into more trouble with a complex (thickness varied) or very thin (2 ply) yarn than you would with a simple 3 or 4 ply which are more tolerant of mistakes.
The yarn supplied in the yarn crate is for learning how to knit, feel free to use it to create small samples and tests. If you want to start a project (scarf, sock, pillow, whatever) please supply your own yarn. If you knit a small 10 needles x 10 rows in your desired ply and tension, measure its dimensions then unravel it and measure the length of the yarn it used, that'll tell you how much yarn you need for your project. Always buy a little extra for mistakes. If you have leftovers, you could consider donating them to the yarn box ;)
For example, 4 ply yarn is the most popular yarn put on cone. At tension 5-7 on the main bed dial with 4 ply yarn it will produce approx 7 stitches and 10 rows to 2.5 cms.
Computer Connection
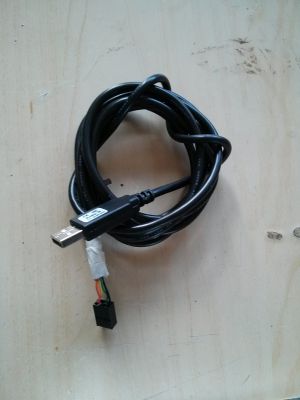
The knitting machine supports an optional Tandy floppy drive, but some clever hackers have worked out how to emulate this floppy drive using a USB-serial cable. We have a functioning USB cable for this machine (as documented here).
To store/retrieve patterns using the USB cable, check out ladyada's excellent tutorial and the github repo. The knitting machine used in this tutorial is a slightly different model to ours - the equivalent button to "step" is "M".
Best talk to Russ (talk) if you have problems with the USB cable.
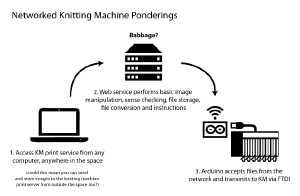
Chixor has been pondering how to convert this rudimentary (steep learning curve) hack into a simple print service interface. Pondering diagram left.
Some inspiration
What can this baby do then?
- Annie Larson’s Colorful Knitwear
- How-To: Hack Your Knitting Machine
- The home of mathematical knitting
Links
- Floppy Drive Emulator
- Brother Accessories Explained
- Knittington, a GUI for the serial interface hack
- Brother Liberation Front more crafting machine hacks
- Knitic a different way to mod a knitting machine


